Create a Wonderfully Colorful “Everlasting Dream” Fantasy Manipulation
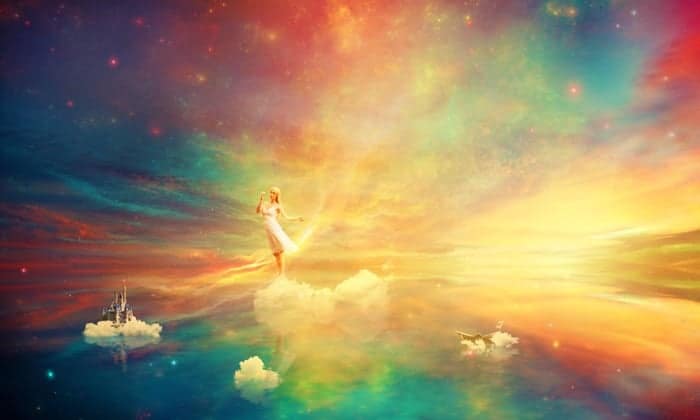
In this tutorial I’ll show you how to create a fantasy, heavenly scene with a beautiful dreamer. You’ll learn how to play with color, blend using adjustment layers and brush, add texture, work with lighting effect and more.
What you’ll be creating
We’ll start this tutorial by creating a beautiful lake scene from a sky image. Then we’ll add nebula texture to increase fantasy effect for the scene. Later we’ll add clouds, paper boat, model, castle and blend them using adjustment layers, masking and brush. Then we’ll continue to build up the color and light of the image with light and nebula textures. Finally we’ll use an adjustment layer to enhance the final effect. I recommend you to use Photoshop CS3 or newer to follow this tutorial properly.
Tutorial Resources
Step 1
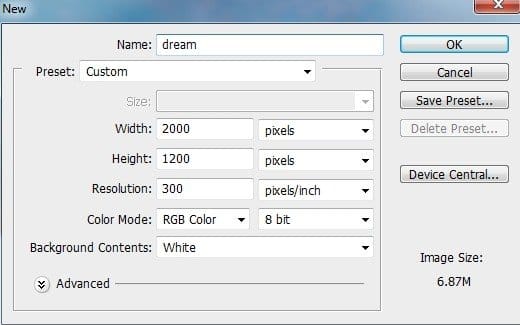
Create a new document in Photoshop with the given settings:
Step 2
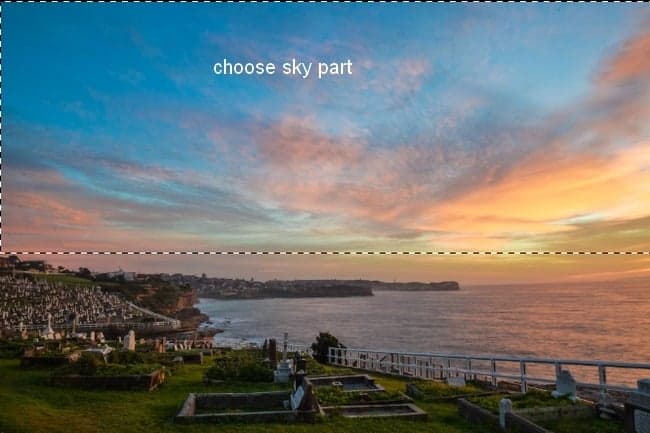
Open the sky stock. Use the Retangular Marquee Tool (M) to make a selection of the sky part:
Use the Move Too (V) to drag this selection onto the top of our white canvas:
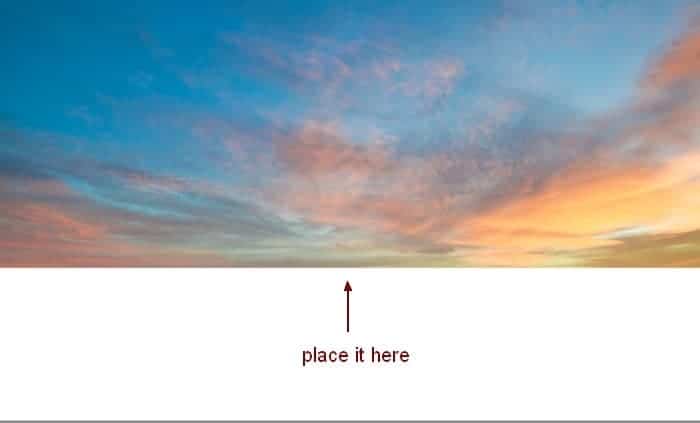
Name it “sky”.
Step 3
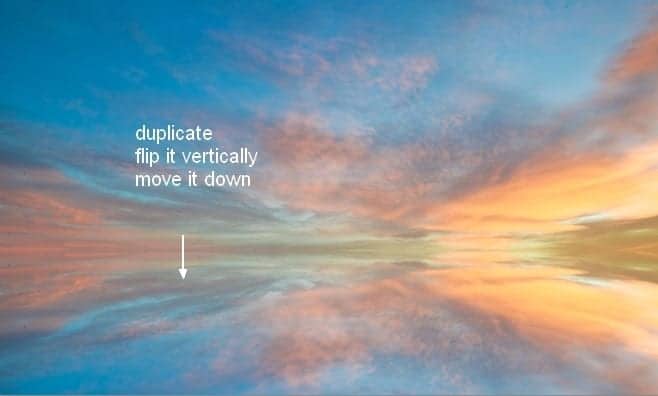
Press Cmd/Ctrl+J to duplicate this layer. Go to Edit > Transform > Flip Vertical, move it down then place this layer under the sky one.
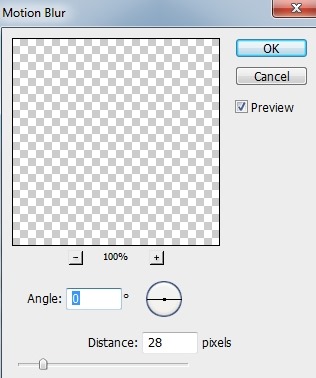
Go to Filter > Blur >Motion Blur and pick the settings below:
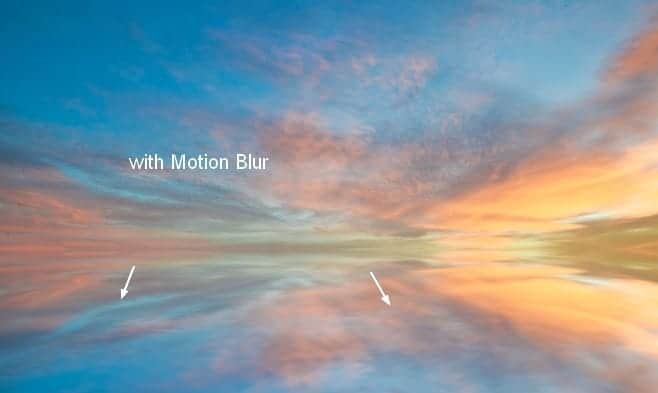
Name this layer “lake”.
Step 4
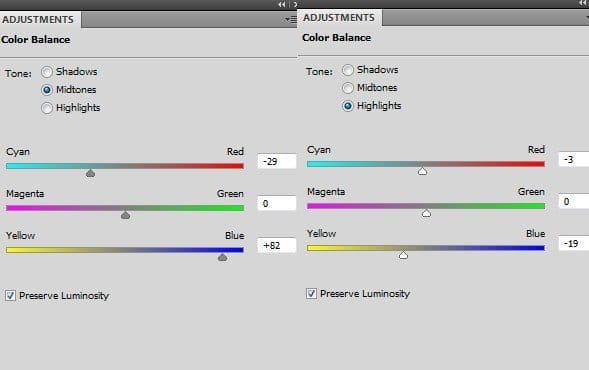
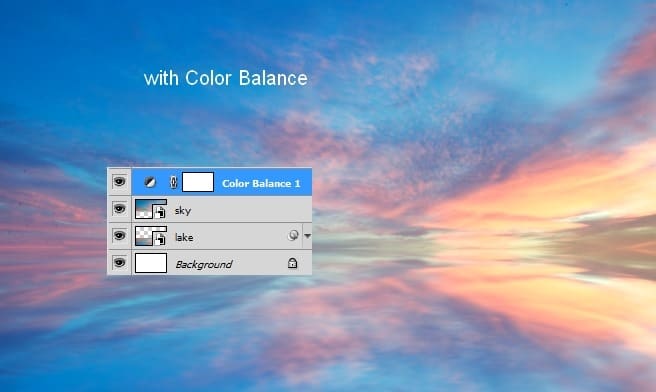
To add some red and blue to the scene, I used an adjustment layer. Go to Layer > New Adjustment Layer > Color Balance:
Step 5
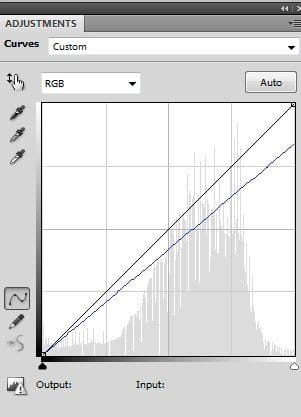
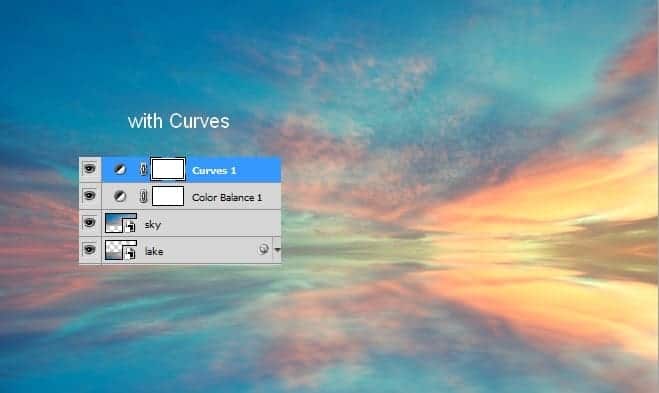
I used a Curves adjustment layer to add some nice cyan tone to the picture:
Step 6
To change the contrast of the pic, I used a Levels adjustment layer:
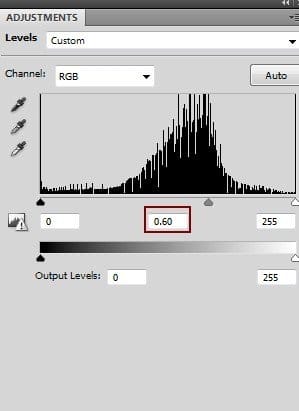
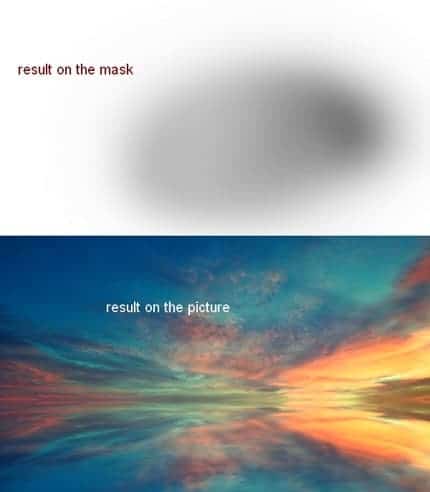
On this Levels layer mask use a soft black brush with opacity from 20-25% to erase the center and right side of the pic. You can see how I did it on the layer mask and result on the picture:
Step 7
To create more light for the sky I used a soft brush with color #f9e398 to paint over the right of the horizon. Change the mode to Overlay 100%:
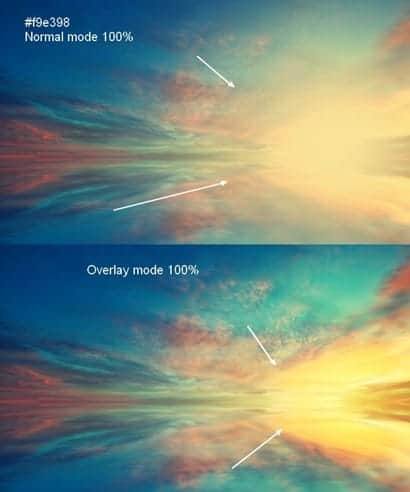
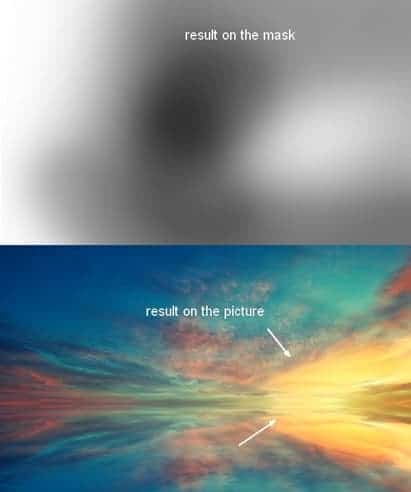
Click the second button at the bottom of the Layers Panel to add mask to this layer. Use a soft black brush to reduce the light effect as the image below shows:
Step 8
Place the nebula 1 image over the picture, then change the mode to Hard Light 100%:
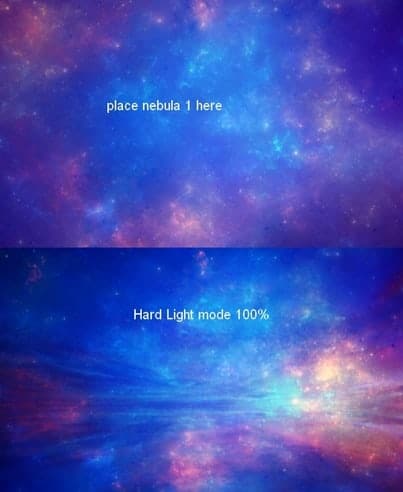
Add layer mask to this one. Use a soft brush to reduce the nebula effect in the sky and on the lake:
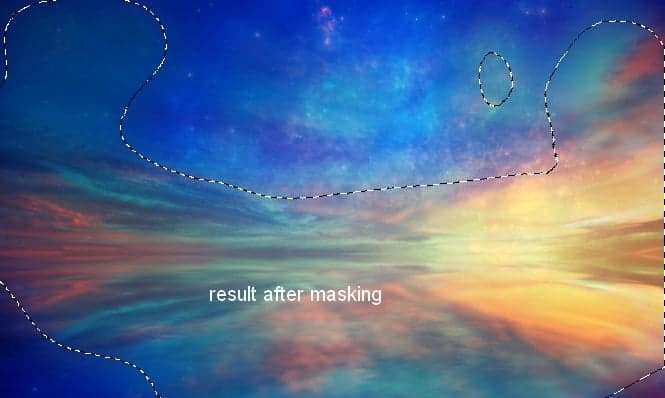
Step 9
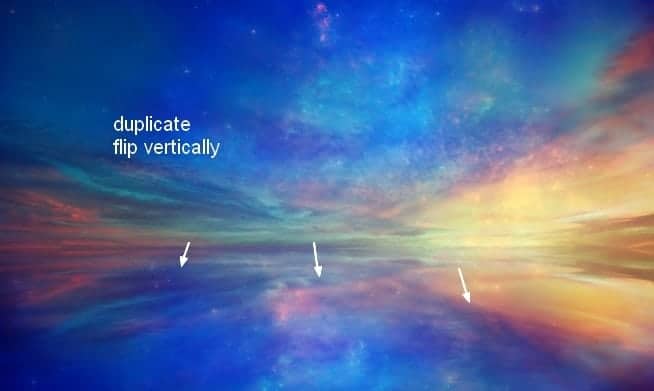
Duplicate this layer, flip it vertically and move it down to create reflection for this nebula effect:
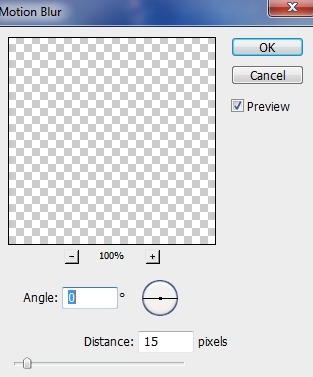
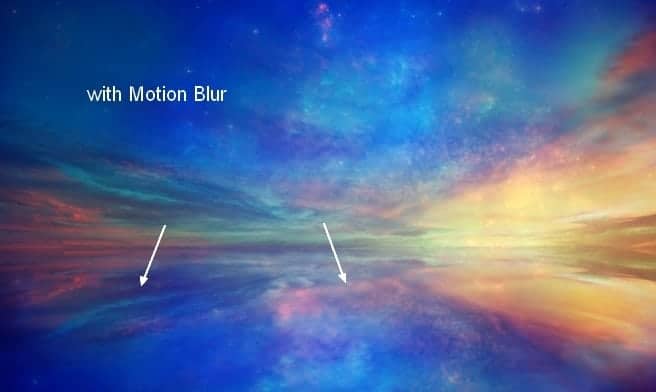
Apply Motion Blur to this layer:
Step 10
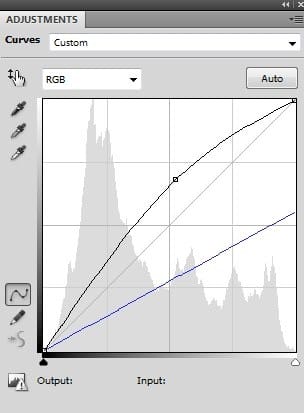
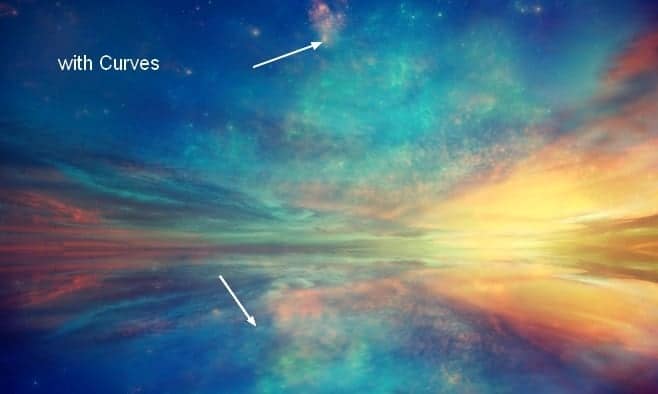
Make the nebula 1 layer and its reflection selected then press Cmd/Ctrl+G to create a group for them. Change the mode of this group from Pass Through (default group mode) to Hard Light 100%. Make a Curves adjustment layer on the top of the layers within this group to change the color of the nebula effect:
Step 11
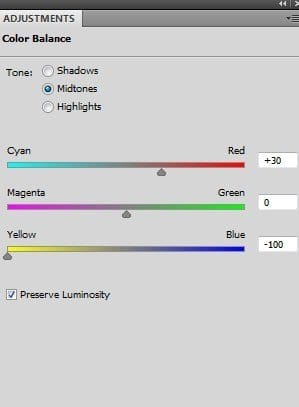
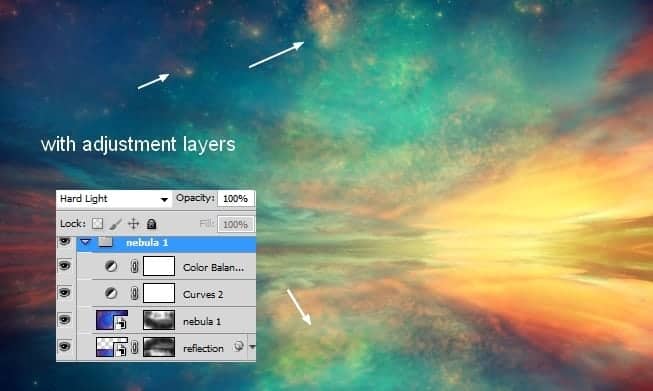
I used a Color Balance adjustment layer to make this effect more vibrant:
Step 12
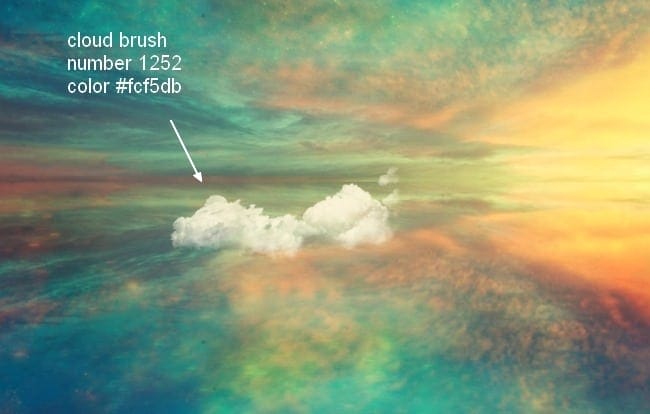
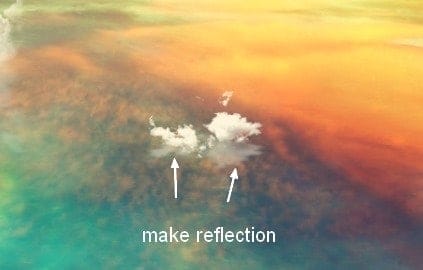
Make a new layer on the top (above the nebula 1 group). Change the brush to the cloud ones. I used number 1252, color #fcf5db to paint a cloud at the middle section of the lake:
Step 13
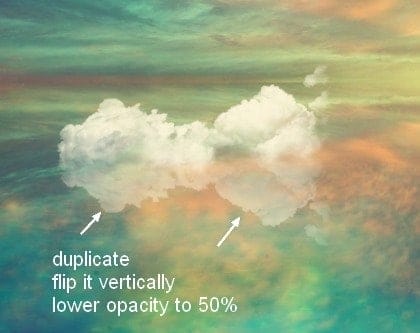
Duplicate this layer, move the lower down to make reflection for this cloud after flipping it vertically. Lower the opacity of this reflection layer to 50%:
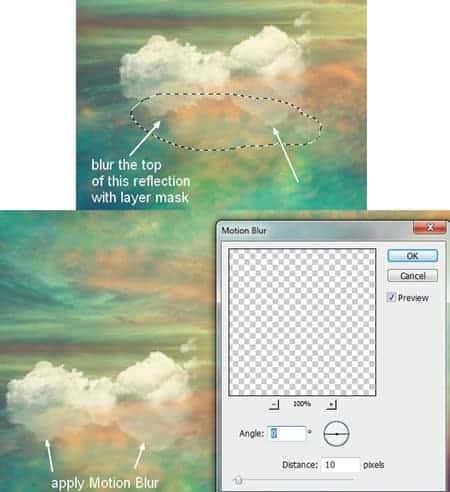
Use layer mask to reduce the top of this reflection then apply Motion Blur :
Step 14
I painted another cloud (number 1369) at the right of the first one:
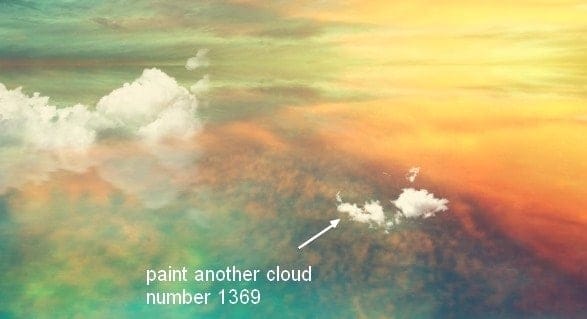
Make reflection for this cloud as done with the first:
Step 15
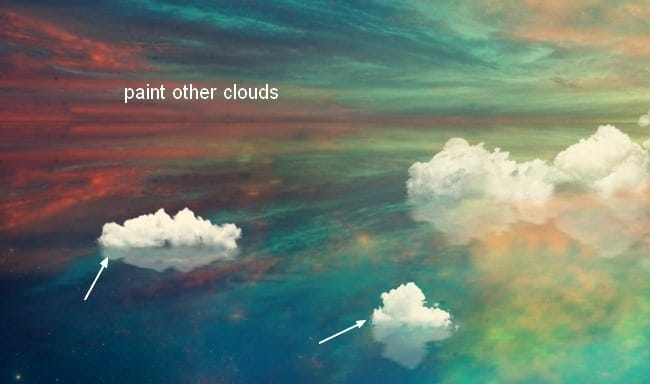
Paint two other clouds at the left of the first and make reflections for them:
Step 16
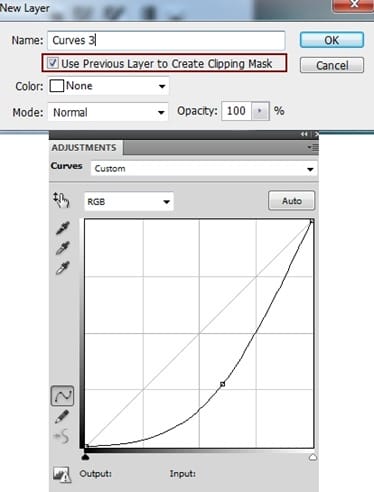
I used a Curves adjustment layer with Clipping Mask to darken a cloud a little:
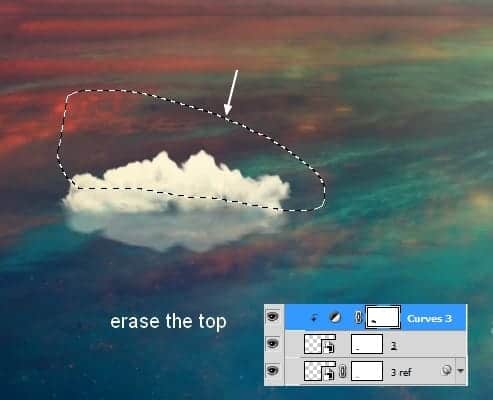
On this Curves layer mask use a soft brush to erase the top to keep it a bit darker than the bottom:
Step 17
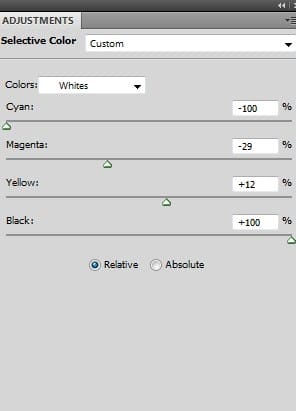
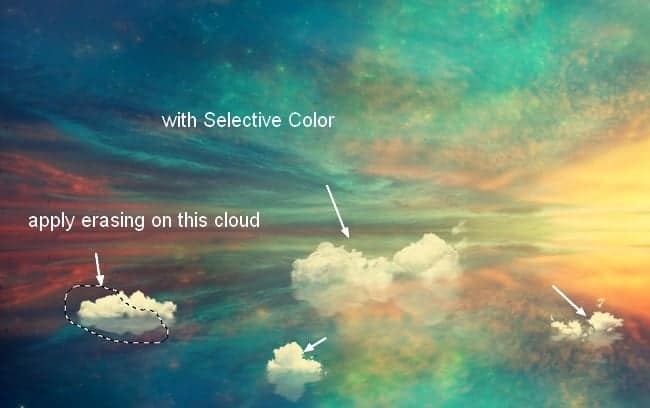
Group all the cloud layers and their reflection ones. Change the mode of this group to Normal 100%. Add a Selective Color adjustment layer to add some yellow to the white clouds:
On its layer mask, use a soft brush to reduce the yellow effect on the cloud at the left edge:
Step 18
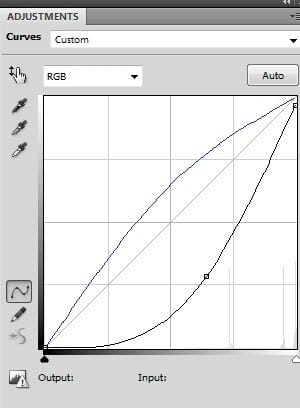
I used a Curves adjustment layer to darken and change the color of the clouds:
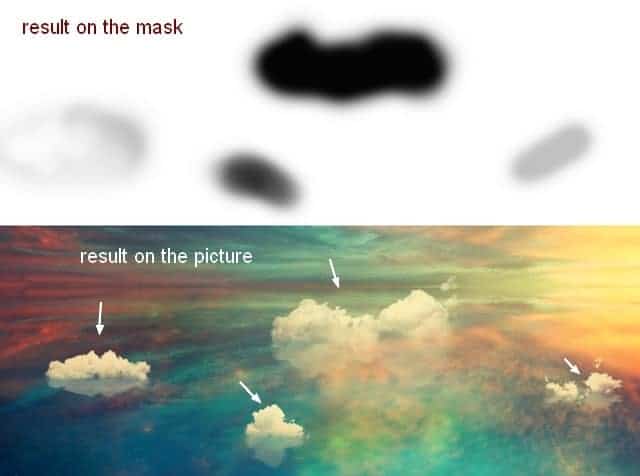
Apply brush masking to refine the light on them. You can see the result on the mask and on the picture:
Step 19
Open the paper boat stock and extract it from the background.
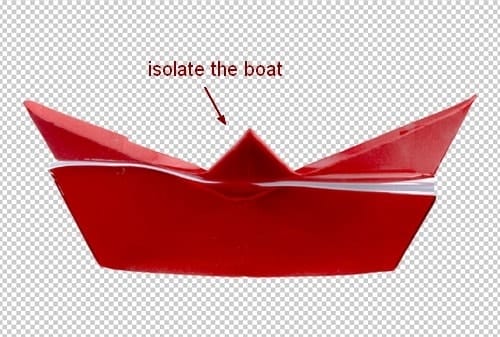
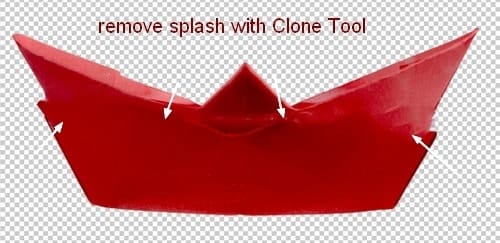
Make a new layer and active the Clone Tool (S). Use this tool to remove the splash on the boat:
Step 20
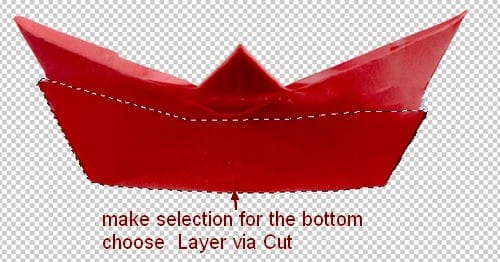
Hide the background layer. Hit Cmd/Ctrl+Option/Alt+Shift+E to merge the extracted boat and the clone layers. To reform this boat, use the Lasso Tool to choose the bottom of the boat, right click it, choose Layer via Cut:
Use the Free Transform Tool (Cmd/Ctrl+T) to scale this bottom down to fit the top of the boat:
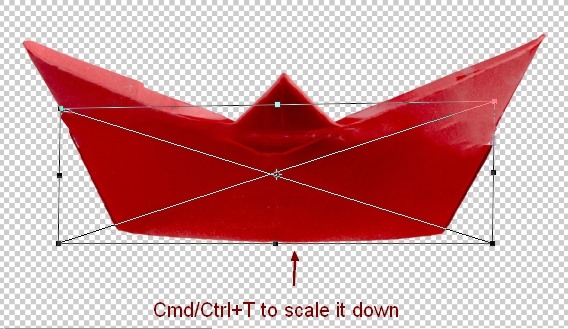
Merge all transparent layers.
Step 21
Place the merged boat at the cloud on the right edge. I set this layer under the clouds group:
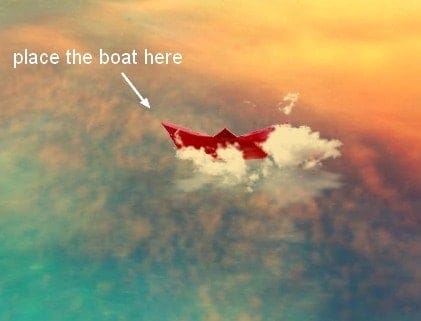
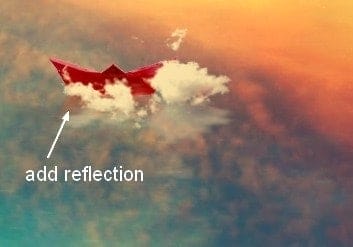
Make reflection for this boat as done with another elements:
Step 22
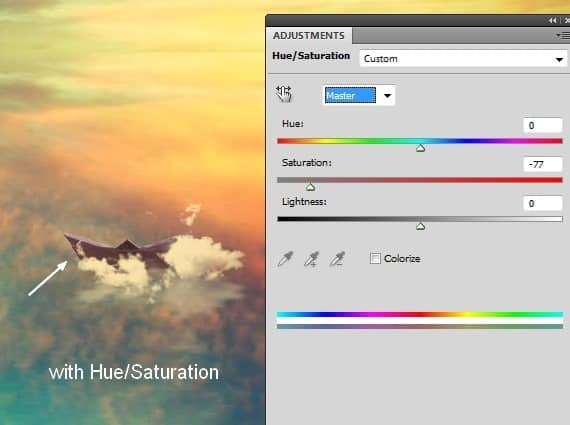
Group the boat and its reflection layers. I used a Hue/Saturation adjustment layer to reduce the saturation of the boat:
Step 23
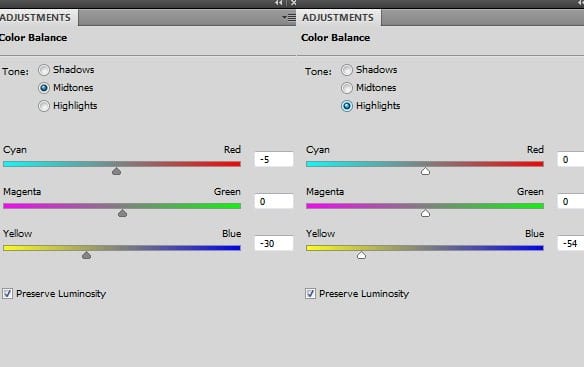
Add some vibrant color to the boat with Color Balance:
Step 24
I used a Curves adjustment layer to brighten the top of the boat:
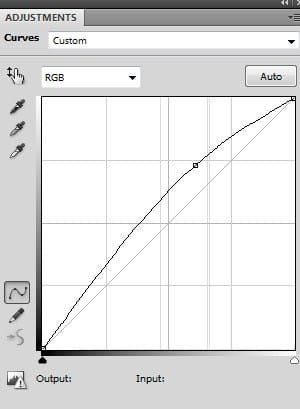
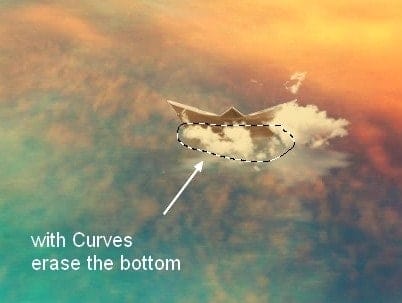
On this Curves layer mask erase the bottom with a soft black brush as it should be darker than the top.
Step 25
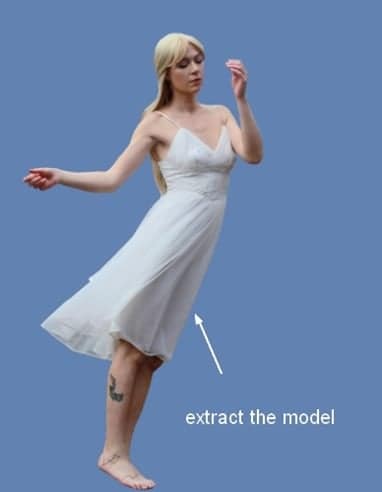
Open the model stock. Use your own method to extract her from the background.
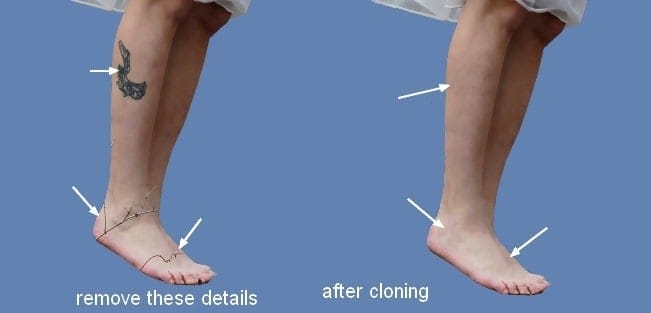
Make a new layer and use the Clone Tool to remove the tattoo and branches on her legs:
Step 26
Make a new layer. Active the Brush Tool with the basic ones and color #989079. Press F5 to change the settings of this brush:
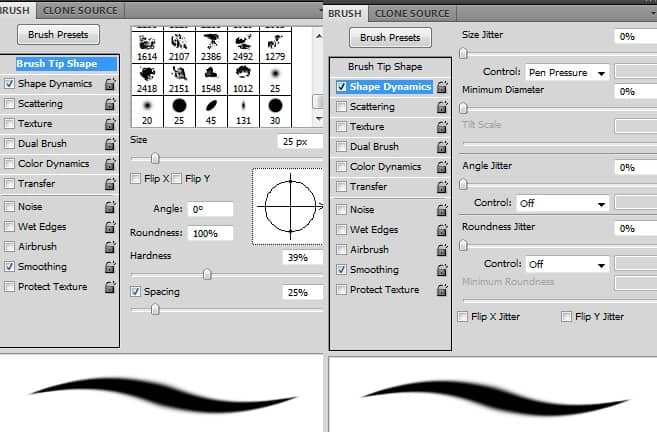
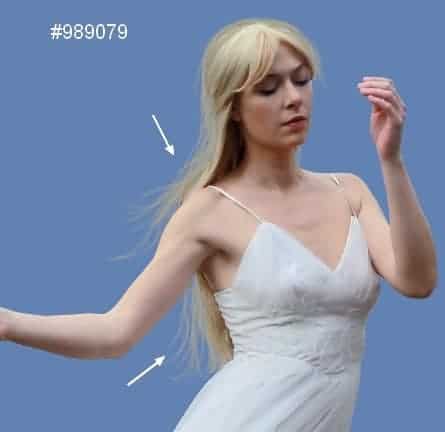
Use this brush to paint flying hair strands for the model.
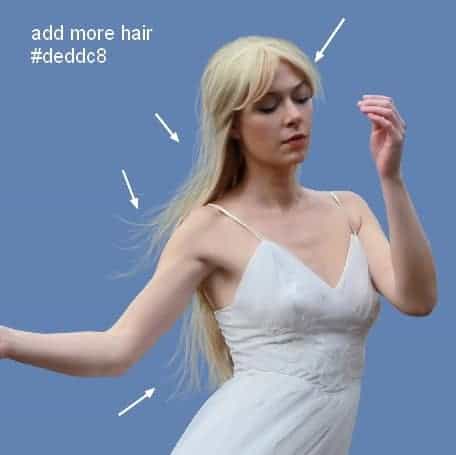
Make another layer and pick the lighter color (#deddc8) for this brush. Paint more hair for her:
Merge the model, clone and hair ones.
Step 27
Place the model onto the biggest cloud (at the center):
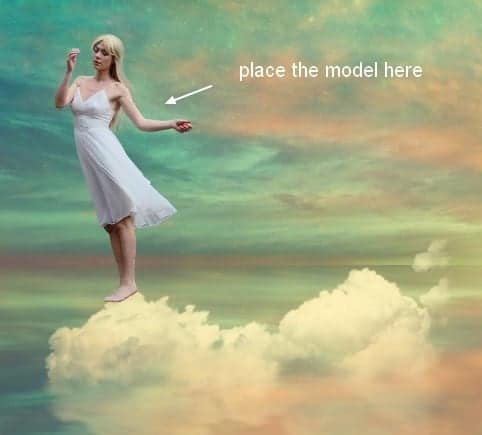
Use layer mask with a cloud brush to blend the model legs with this cloud:
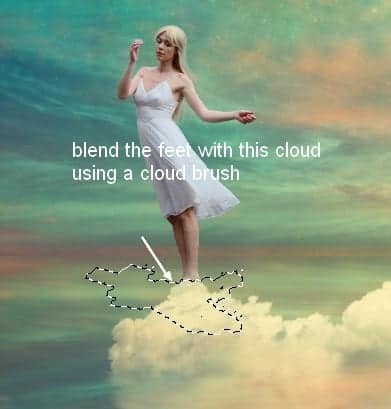
Step 28
Make reflection for the model as done with the others.
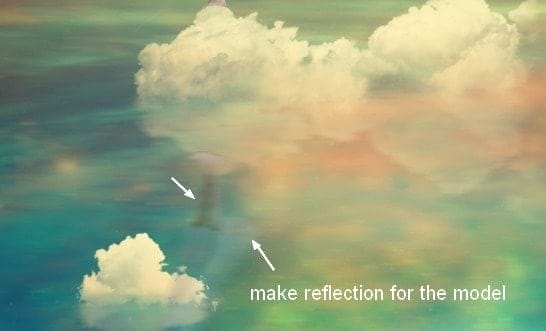
Step 29
Group the model and her reflection layers. Make a Hue/Saturation adjustment layer within this group to reduce the redness on two these layers:
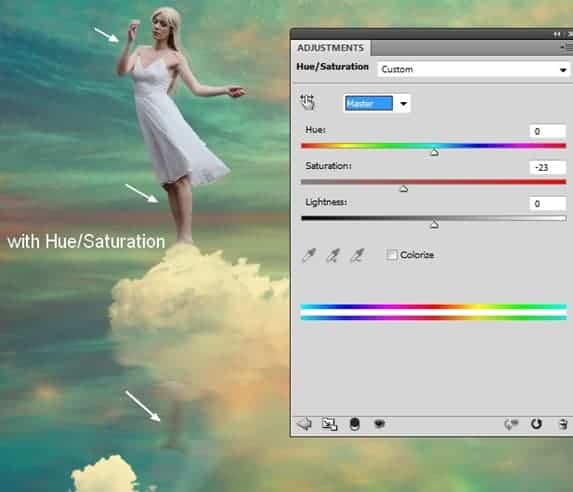
Step 30
Use Color Balance to add some vibrant yellow to the model:
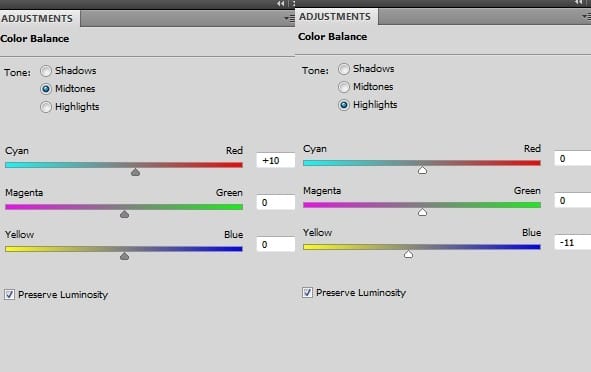
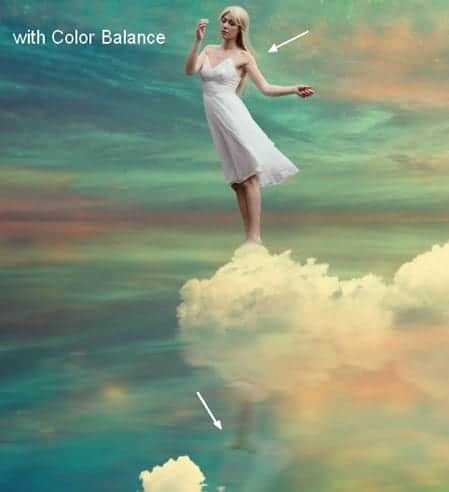
Step 31
I used Curves to darken the front of the model then erase the rest of hers to keep its brightness:
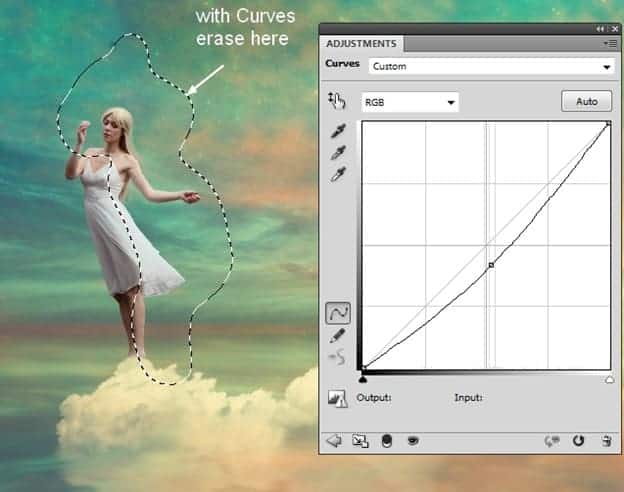
Step 32
To add some bright yellow light of the scene reflected on the model and her reflection I made a new layer, used a soft brush with color #ecc886 to paint on the right of them. Change the mode of this layer to Overlay 100%:
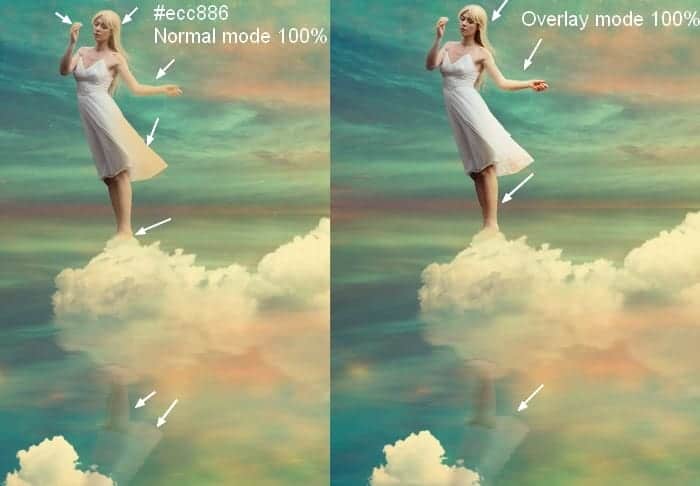
Step 33
Cut out the castle and place it onto a left cloud. Pick a cloud brush (I chose the number 1369) to blend this castle with the cloud:

Make reflection for this castle as done with another elements:
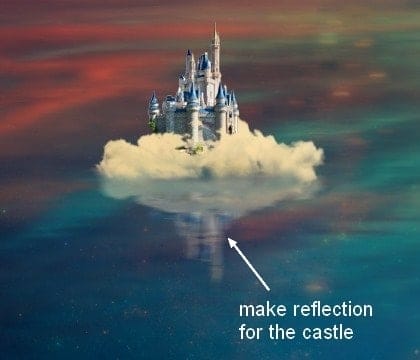
Step 34
Now come back to the clouds group. Select the mask of the cloud’s reflection mentioned in previous step. Choose the cloud brush you used to mask off the castle and press F5 to flip its position:
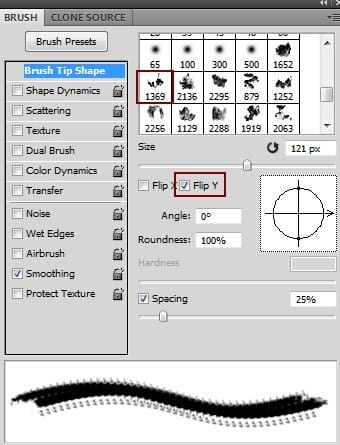
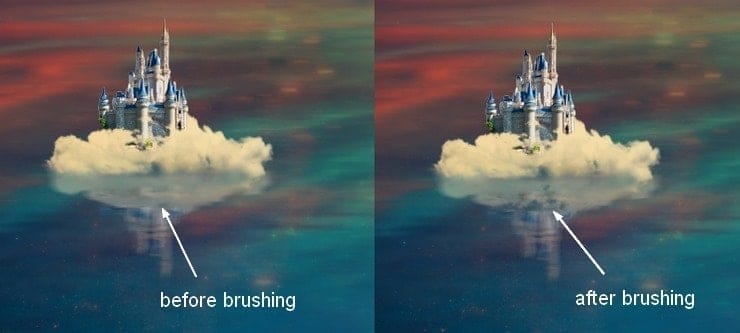
Paint on the top of this reflection to create a likeness between this cloud and its reflection through the lake:
Step 35
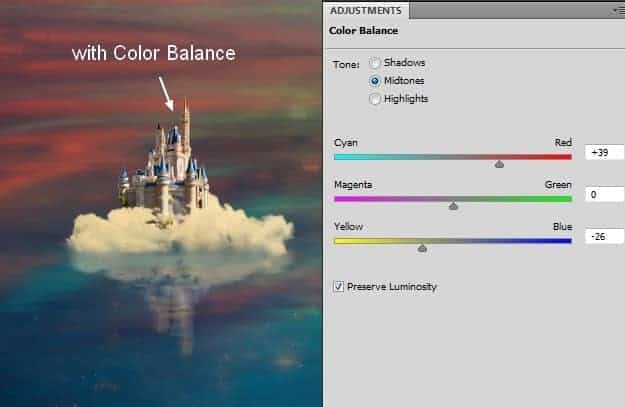
Group the castle and its reflection layers. Use Color Balance to add some warm color to them:
Step 36
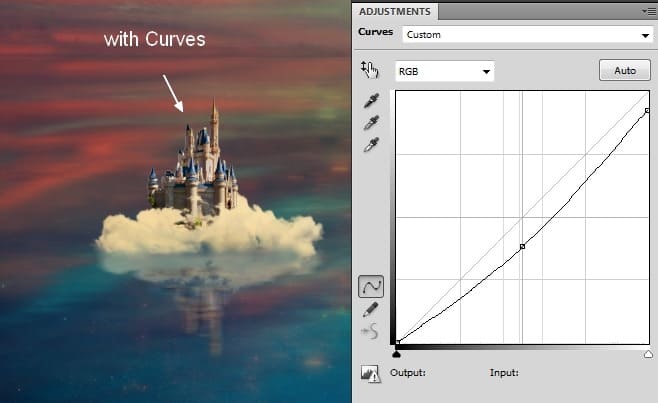
Use a Curves adjustment layer to darken them a little:
Step 37
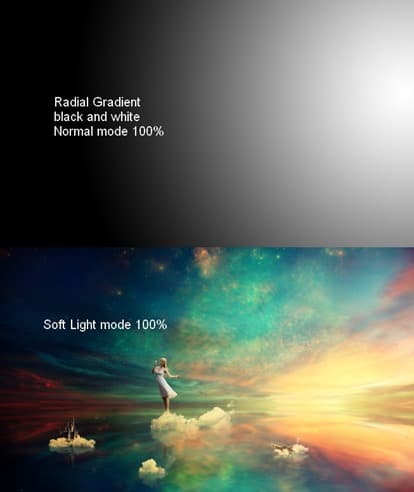
To change the contrast of the whole scene, make a new layer on the top . Active the Gradient Tool (G), choose Radial Gradient with default colors (black and white). Change the mode to Soft Light 100%:
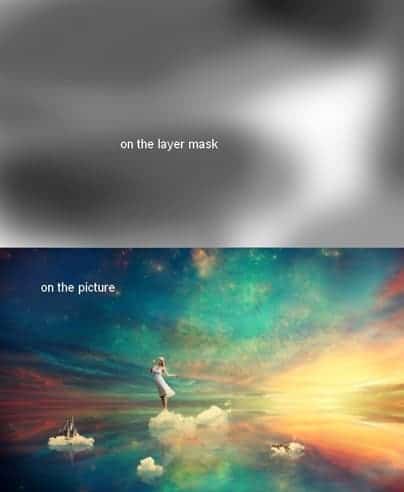
Apply layer mask to refine the contrast of the image:
Step 38
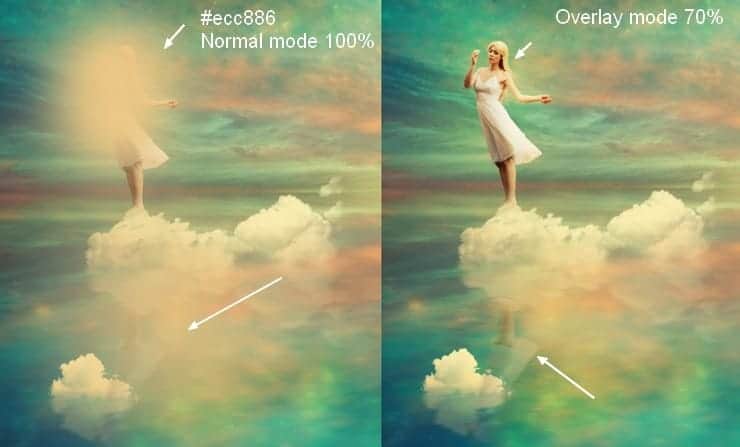
In this step I use a soft brush with the color #ecc886 to paint over the model and her reflection to give them a glowing effect. Change the mode to Overlay 70%:
Step 39
Open the light 1 images pack. I chose “starry4″ to cover the working image then set the mode to Screen 100%:
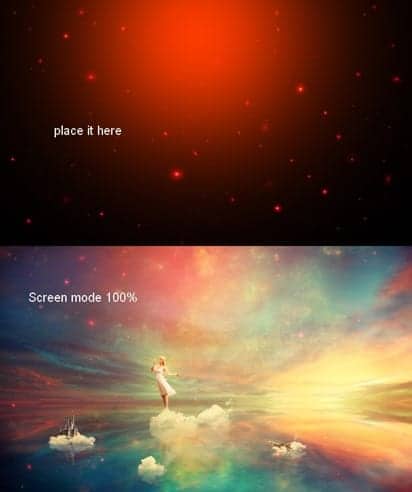
Use a soft brush with opacity about 20-25% to reduce the red effect on the top of the scene:
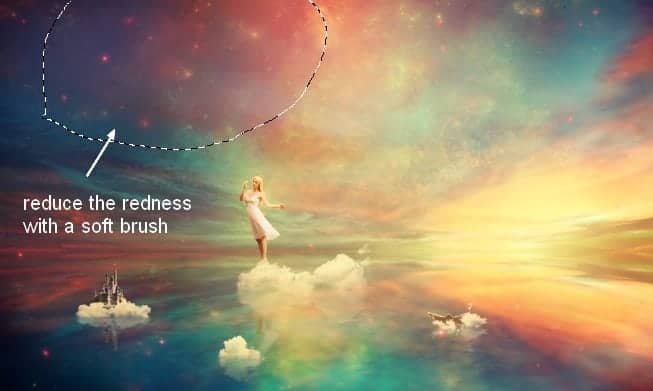
Step 40
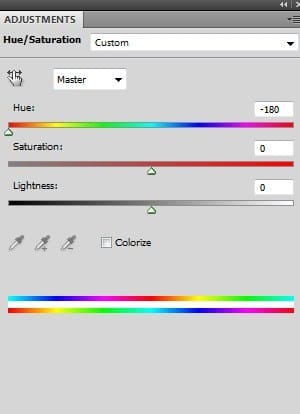
I used Hue/Saturation to turn some of the glowing dots on the lake into blue:
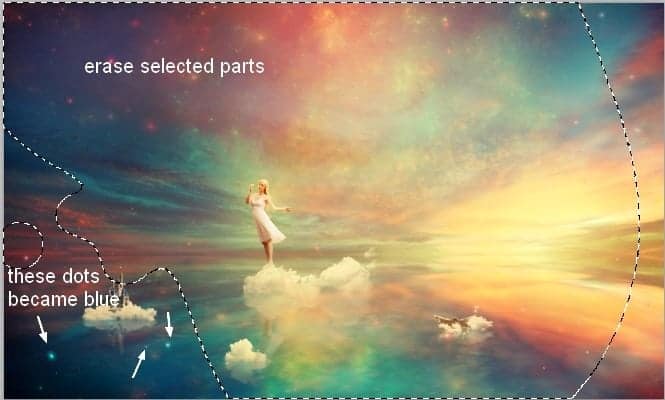
Erase the higher parts to keep their color as before adding Hue/Saturation:
Step 41
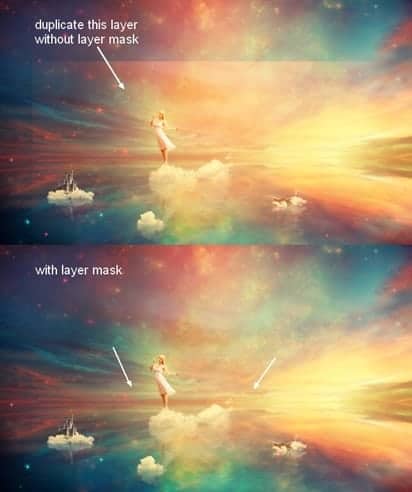
Duplicate this light layer and lower its position at the center. Apply layer mask to smoothly blend it with the scene: :
Step 42
After duplicating it again , move it to the top right and erase gently this effect with layer mask:
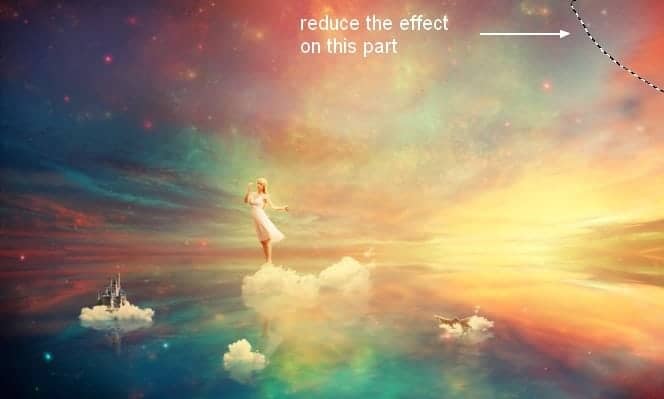
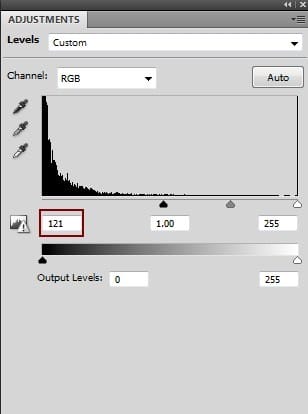
I used a Levels adjustment layer to reduce the saturation of this part:
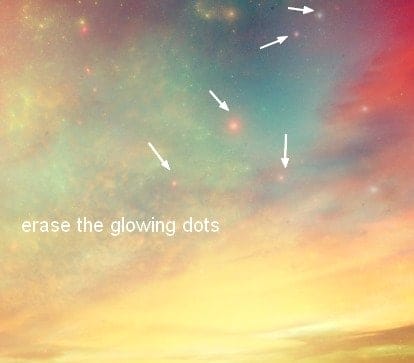
On its layer mask use a soft brush to erase some of the glowing dots :
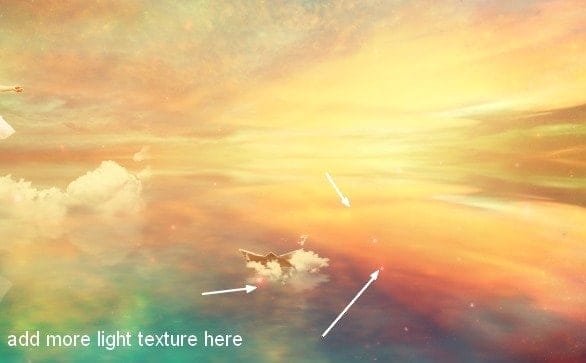
Step 43
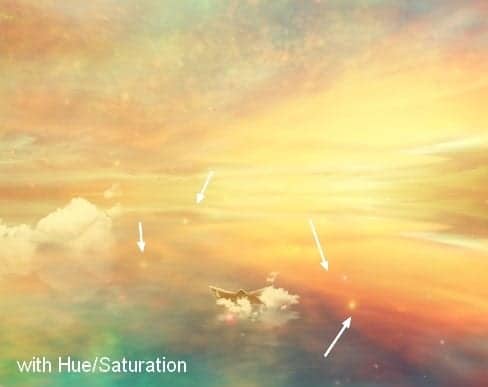
Add this texture to the part around the paper boat:
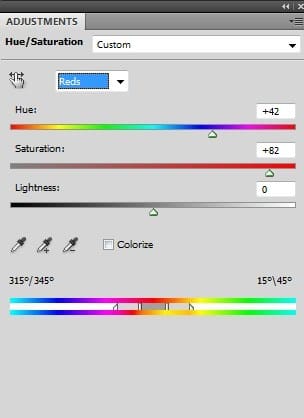
I used Hue/Saturation to turn the color into a bright yellow:
Step 44
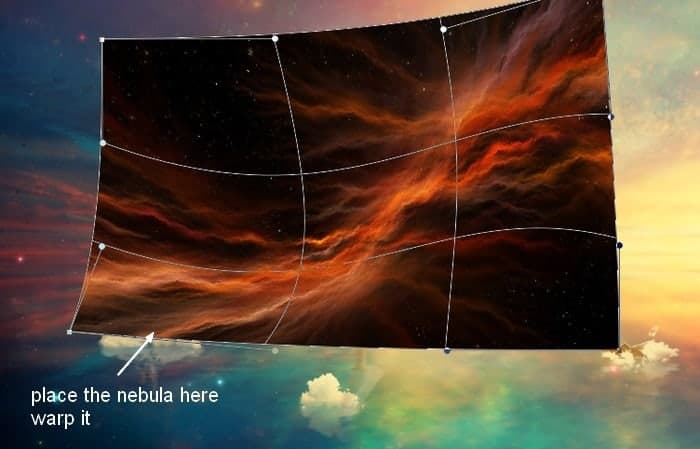
Place the nebula 2 image at the model position. Use the Warp Tool (Edit > Transform > Warp) to bend this image as shown below:
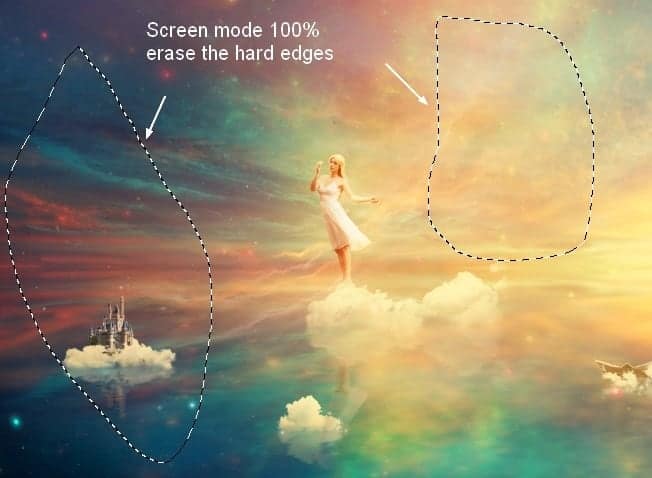
Change the mode to Screen 100% and use layer mask to remove the hard edges:
Step 45
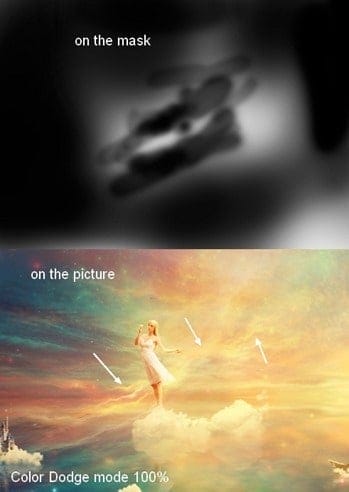
Duplicate this layer and alter the mode to Color Dodge 100%. Here are the results of its layer mask and the picture:
Step 46
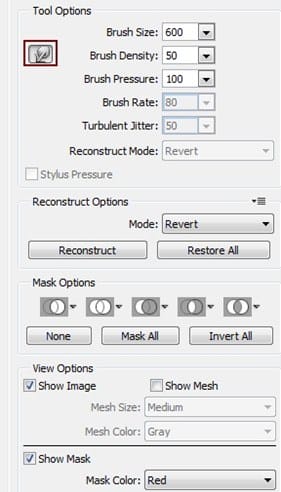
Open the light 2 images pack and choose number 38 (feel free to take the one you like). Press Cmd/Ctrl+J to duplicate this layer. Go to Filter > Liquify and choose the Forward Warp Tool with the settings below:
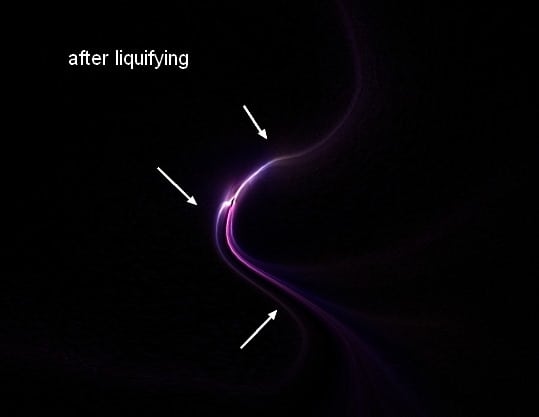
Use this tool to turn the form of this light into a curve:
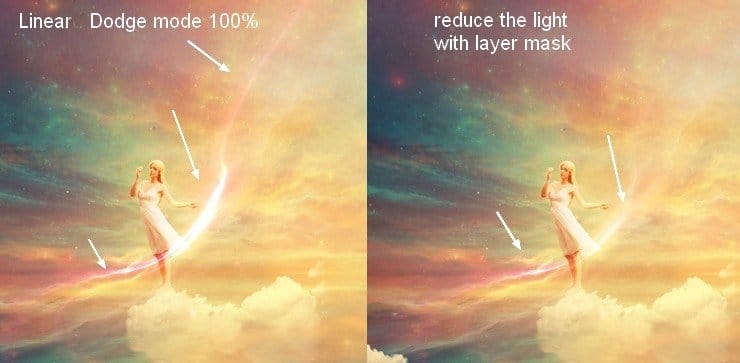
Step 47
Drag this result onto the model part and bend it a little with the Warp Tool:
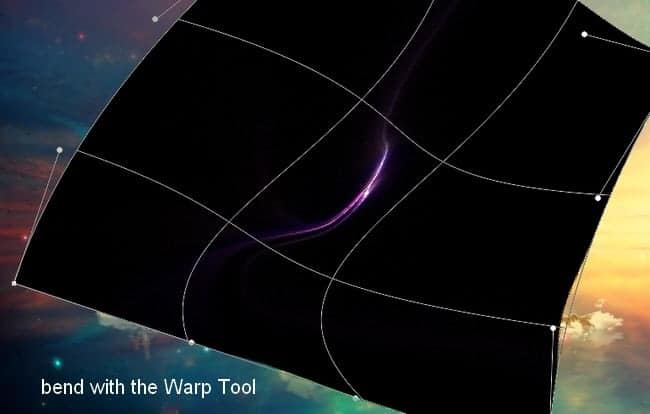
Change the mode to Linear Dodge 100% and use layer mask to reduce the light effect:
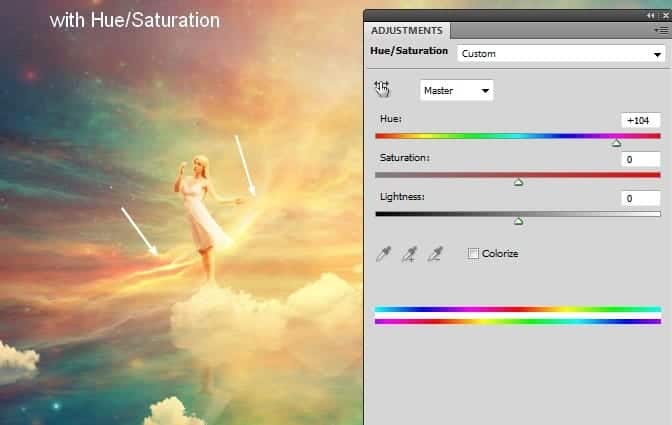
Step 48
Use Hue/Saturation to change the light color to a bright yellow:
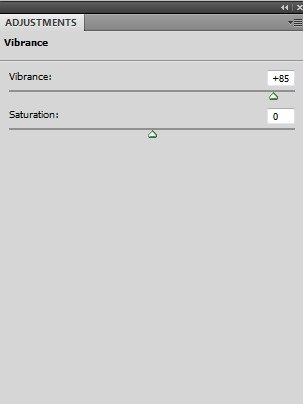
Step 49
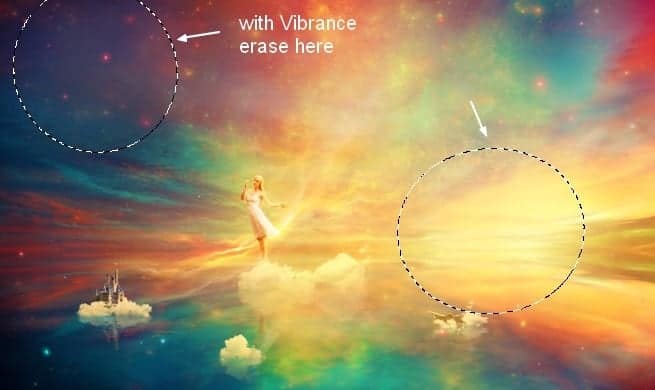
Add a Vibrance adjustment layer to the top of the layers:
On this adjustment layer mask use a soft brush to reduce the effect on the following parts:
Final Results
![dream49-final[1] dream49-final[1]](http://www.photoshoptutorials.ws/wp-content/uploads/2014/06/dream49final1.jpg)
0 comments:
Post a Comment