Create an Eerie Photoshop Composite of a Dark Queen in a Cemetery
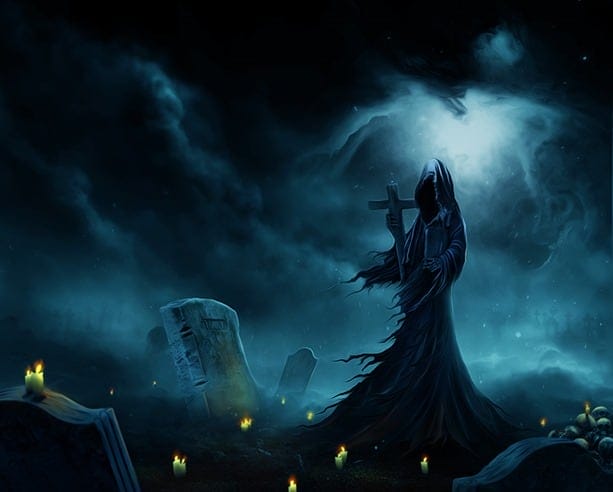
In this tutorial we will create a dark dreamscape of a spooky figure using some image stocks. We will use some essential techniques in applying dodge and burn tool and smudging as well. We will use masking, brush tool, some filter, color adjustments all through the steps in this tutorial. Use Adobe Photoshop CS3 or higher. Get ready to have fun following this tutorial so why don’t you serve yourself a glass or more glasses of coffee and optionally a pack of cigarette for your companion;-) Let’s start….!
Tutorial Resources
- Statue – freeimages
- Tomb 1 – freeimages
- Tomb 1 – freeimages
- Smoke – freeimages
- Nebula 1 – pixabay
- Nebula 2 – pixabay
- Ground – pixabay
- Cemetery – DeviantART
- Hood – DeviantART
- Candles – DeviantART
- Skeletons – DeviantART
- Skeletal arms – DeviantART
- cloth – DeviantART
Step 1 (Preparing stock)
Before starting this tutorial, make sure that we have downloaded all the stock images provided. In early steps we will create a figure of a dark queen. Let’s start by opening the statue image from which we will create and manipulate the figure.

Now extract the statue form its background. We can use one of the extracting tools in Photoshop that is familiar with us. I myself used pen tool for this purpose. I assumed that we have familiar with this tool so I won’t explain about how to use it. Here is the extracted statue I created.

Step 2 (A new document for the figure)
Now we will start manipulating the statue into a dark queen figure. We will do this in a new document (canvas), so create a new document by hitting Ctrl+N to open the new document option box. Here is the size of the document:

Next place the extracted statue in the new document. Hit Ctrl+T to activate free transform tool. Alter the shape of the statue by warping it a bit.

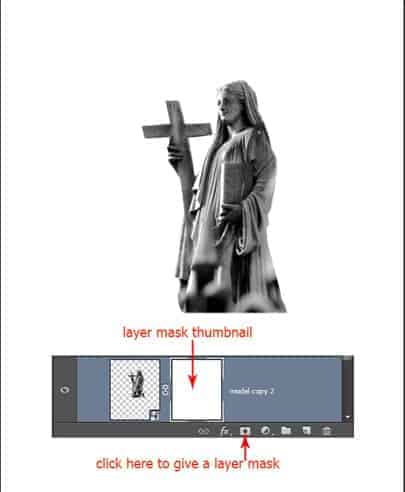
We will hide lower part of this statue. To do this, we will give this layer a layer mask. Make sure we are active on the statue layer, then click the layer mask icon located in the bottom of the layer panel to give this layer a layer mask. The layer mask is indicated by a white thumbnail next to the layer.
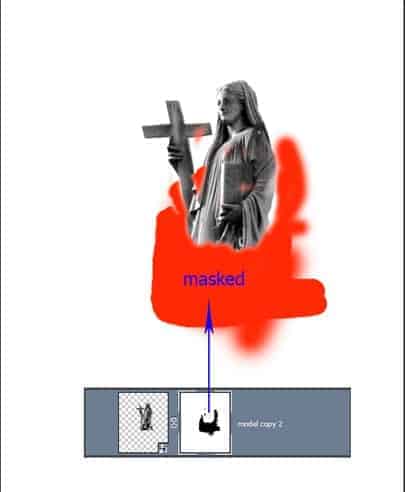
Take a very soft round brush (0 opacity) and set the foreground color to black. Now with black color, stroke the brush on the lower part of the statue to hide it. The part is highlighted by red. There is black spot in the white mask thumbnail as indication of masking.
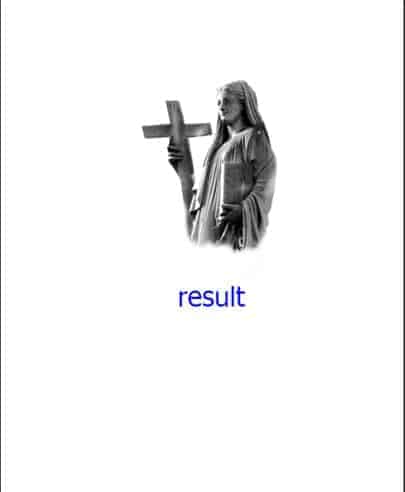
Now we have the lower part of the statue is masked.
Step 3 (Manipulating the stock)
Firstly we will manipulate the cloth in the hands of the figure. We will try to add torn cloth on them. To find out what it will look like, here is the scratch for reference.

Create a new layer (Shift+Ctrl+N) below the statue layer. Take pen tool and create a torn cloth like shape on this new layer. Fill it with color #504e4e. I named this layer left cloth.

On a new layer create similar shape for the right hand. I named this layer right cloth.
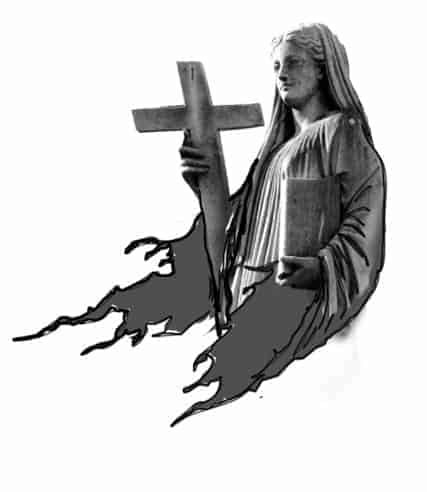
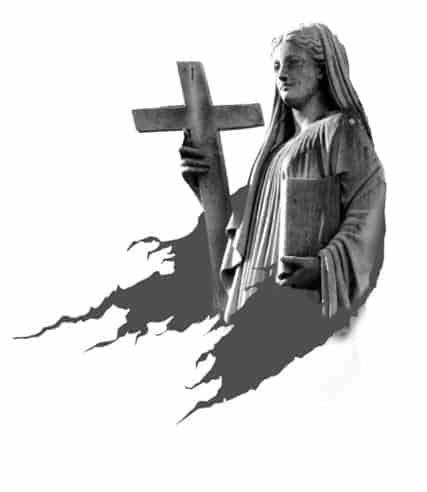
Step 4 (Defining details)
Next we will start defining the detail of the both cloth. We just simply do this with combination use of dodge and burn tool. Open the tool in the tool panel. Set its setting to the values given below. We can change the values accordingly later.

Details on right hand cloth
We will start defining the details on the right cloth. Go select again the right cloth layer. Start stroking the dodge and burn tool on areas where needed to give it some worn and crumpled parts on the cloth.
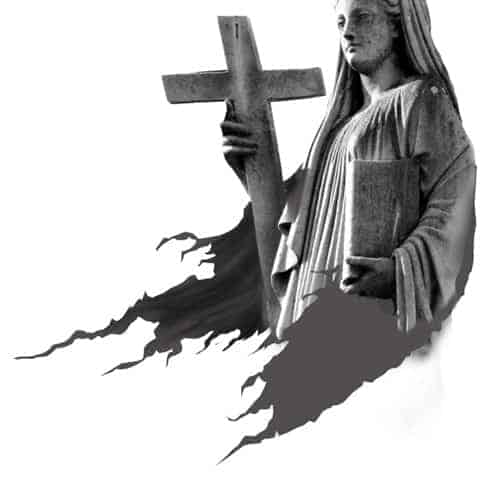
Keep on applying the combination of the both tool to give more details. We can change both the size of the brush or exposure accordingly depending on the areas to be stroked. We also can choose highlight for its range.
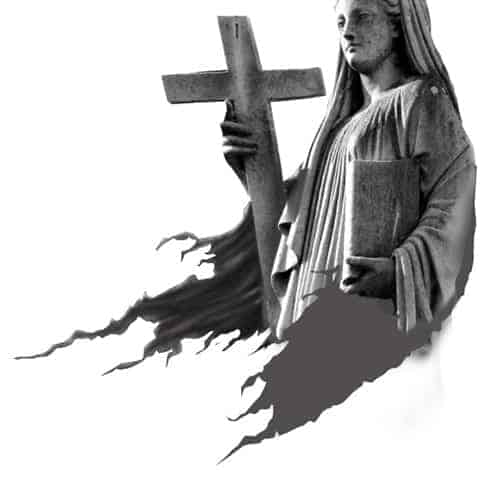
After finding desired result, we can duplicate the layer (Ctrl+J) and set its duplicate to soft light blending at desired opacity of about 80-100%. This will give more brightness and contrast to the layer.
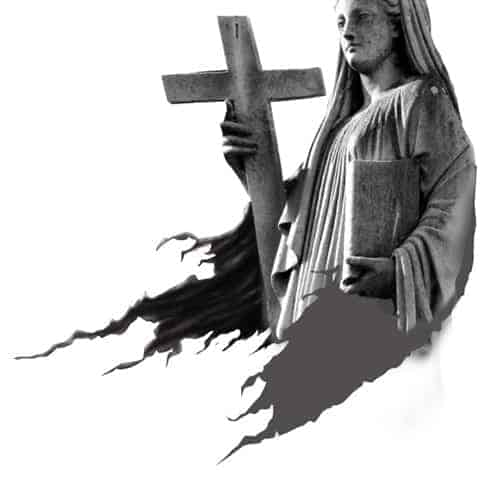
Step 5 (Left cloth)
Do the same way to give details on the left cloth.


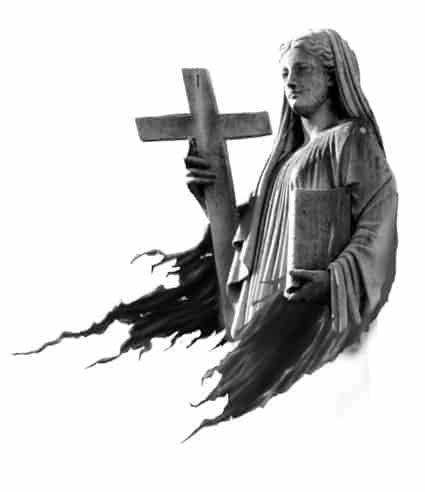
Step 6 (Smudging)
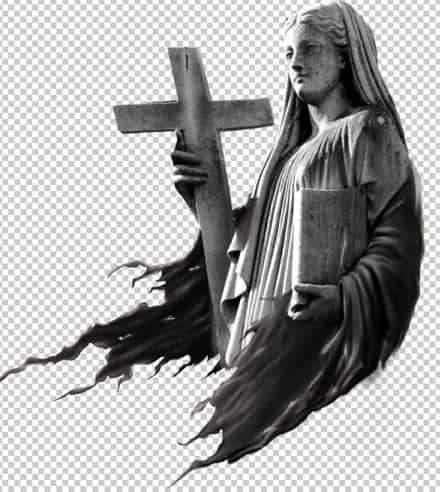
Next we will blend the both cloths to the main whole body of the statue. We will do this by smudging. Firstly, activate the smudge tool in the tool panel. Set its setting for this tool as given below. This setting can be changed accordingly as well. Make sure to keep checking sample all layers option.
Create a new layer above the extracted statue layer. On this layer, start stroking the tool to the direction where needed to blend the image.
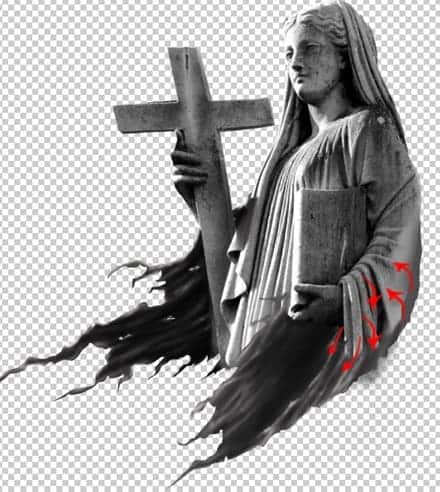
Here is the result.
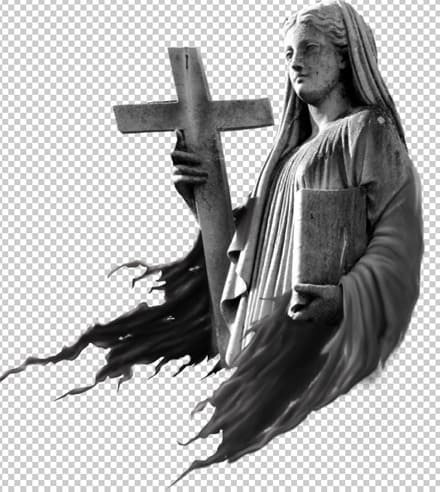
To define more contrast and brightness of the blending, we can duplicate this layer and set its blending to soft light and give it burn or dodge on some parts.
Step 7 (smudge on cloth on main body)
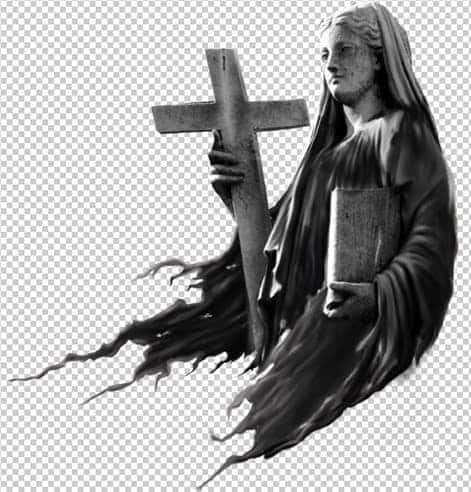
Create another new layer and give some smudge on the main body. Do similar way as in previous step 6 to do this. Here is the result so far….
Step 8 (Adding hood)
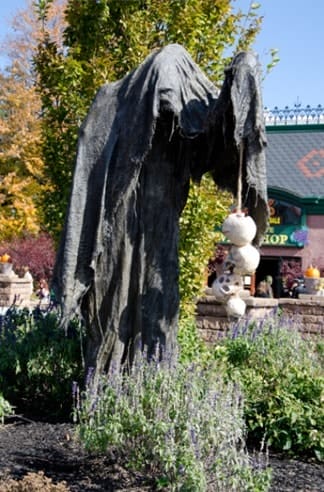
Now we will add hood for the figure. Open the stock image and cut out the part needed.
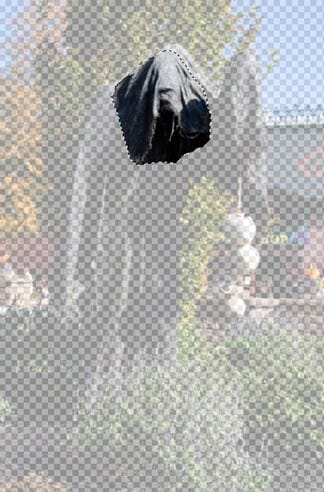
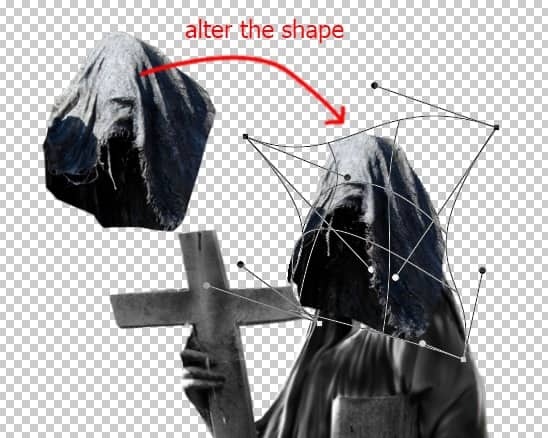
Place the cut out above the smudge layers in the main document. Scale its size and warp to alter its shape.
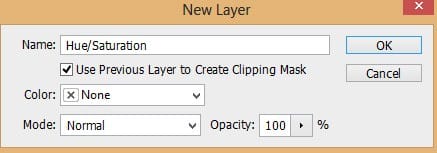
Go to layer > new adjustment layers > hue/saturation. Make sure to give this adjustment layer a clipping mask by checking use previous layer to create clipping mask.
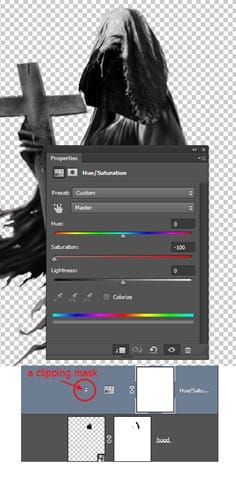
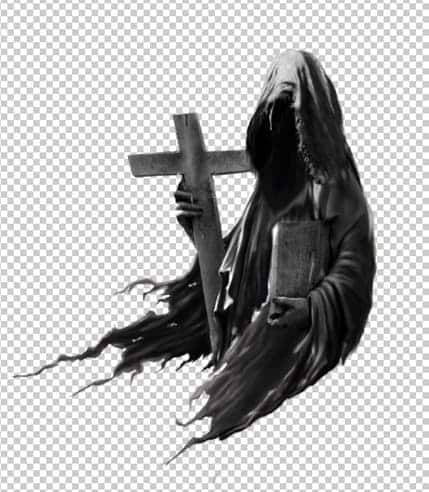
To blend the hood with the rest part of the image, we do this by applying similar ways like the ones in previous step 6 and 7. I did this on a new layer.
Step 9 (fixing the fingers)
Next, we will replace the fingers of the figure. We will give it skeletal fingers. Open the stock image. Cut out one of the skeletal arms.
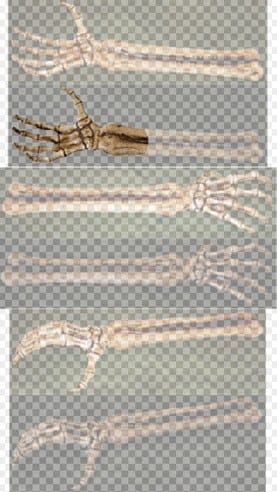
Place the cut out on the main document. Scale and arrange its position in such way that it is fit the original fingers.
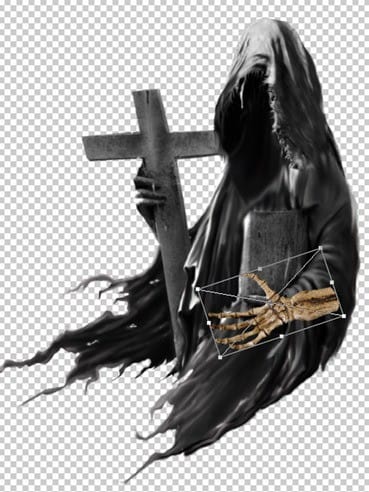
Mask unneeded part..
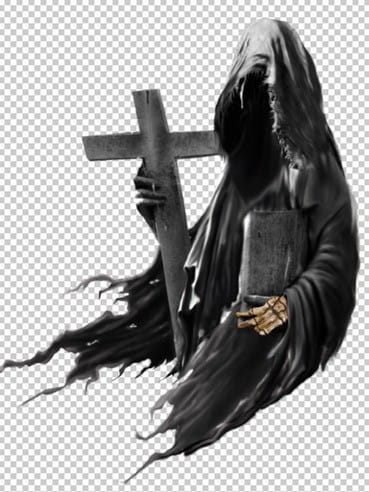
Cut out one of the fingers and place the cut out right on the thumb finger of the figure. Select all the finger layer and hit Ctrl+E to merge them.
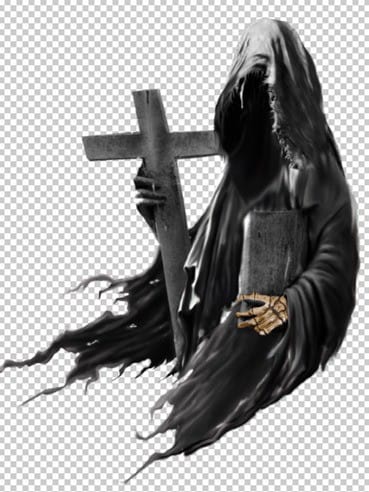
Adjust the color of the merged finger layer to match the rest of the image. We just simply give it two adjustment layers with clipping masks : Hue/saturation and level.
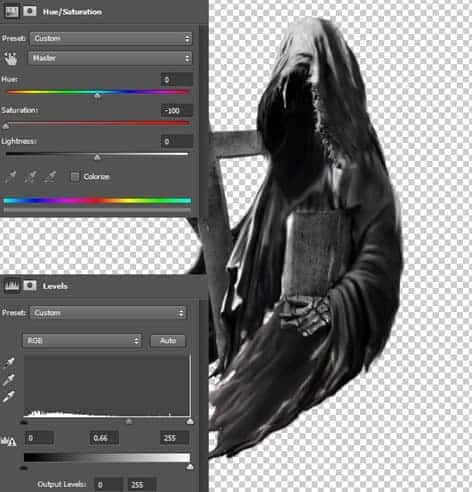
Do similar way to add skeletal fingers to the other ones.
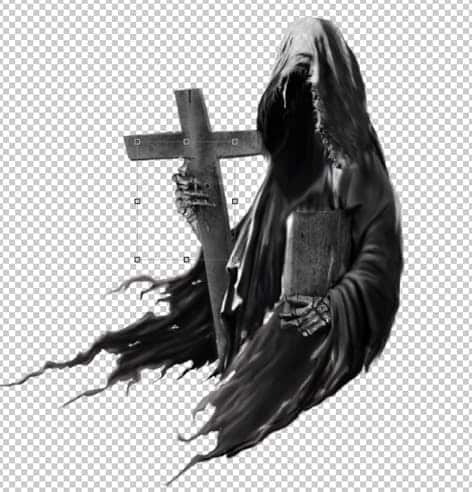
Step 10 (Adding lower cloth)
Let’s complete the figure by adding lower cloth for the figure. Create a new layer below all the other layers. On this layer, create a shape for the cloth like the one shown in the screenshot.
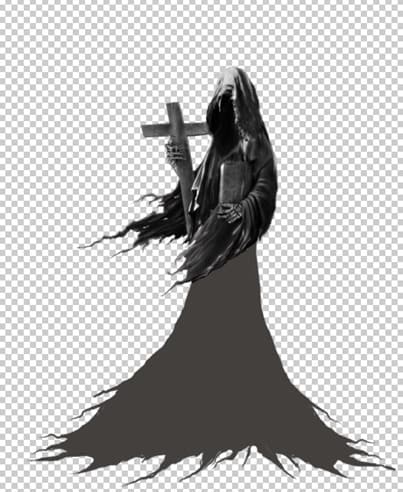
Giving the cloth some details by adding some worn and crumpled parts where needed. Remember previous steps to do this because these are just repeating steps. Here is the former shape I created, however………
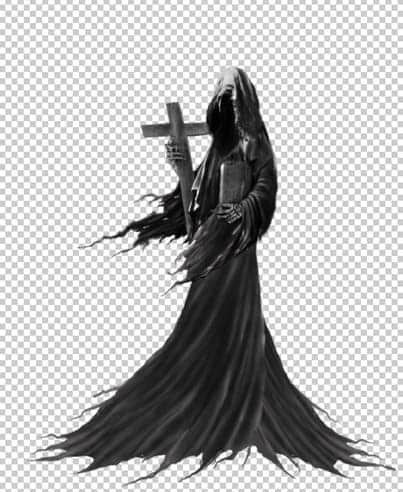
I don’t think all of you will find a good result ;-) so just skip this step and find the other simple way to add some lower cloth. To do this we will add the lower cloth by cutting out part of the cloth from the stock image below and use it as the texture for the cloth.
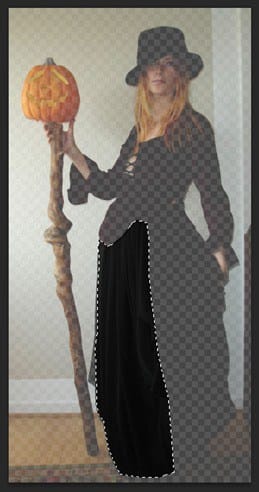
After cutting out the part, place the cut out above the lower cloth layer and make sure to give this cut out layer a clipping mask. Scale and alter its shape by warping. Duplicate the cut out some times as needed. Make sure to give all the duplicate layers clipping masks. Arrange, position and alter their shapes as needed to cover the lower cloth:
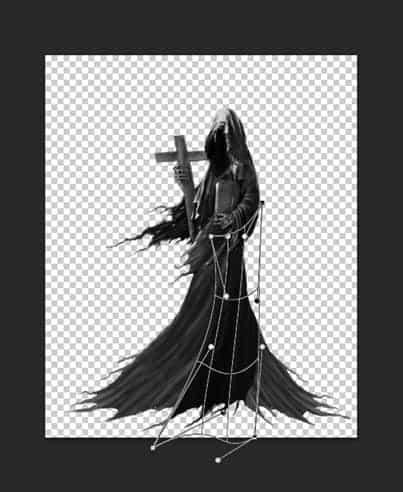
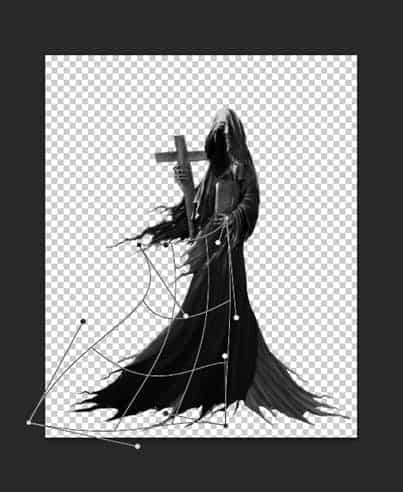
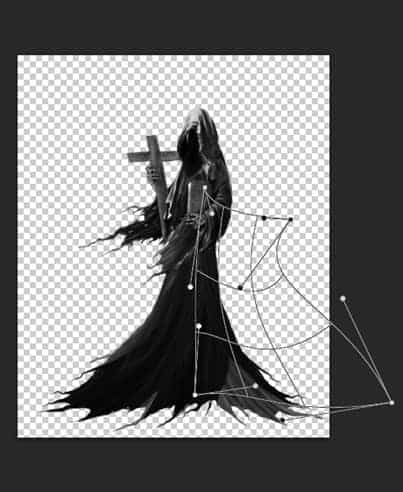
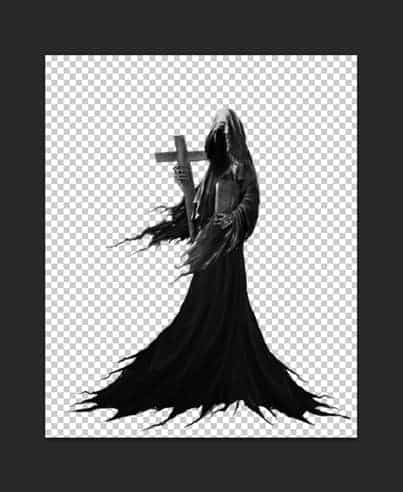
Step 11 (Adjustments on the lower cloth)
Now create another new layer above all the duplicate layer and fill this layer with 50% gray color. Set this layer to overlay blending at 100% opacity.
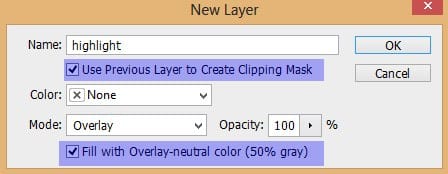
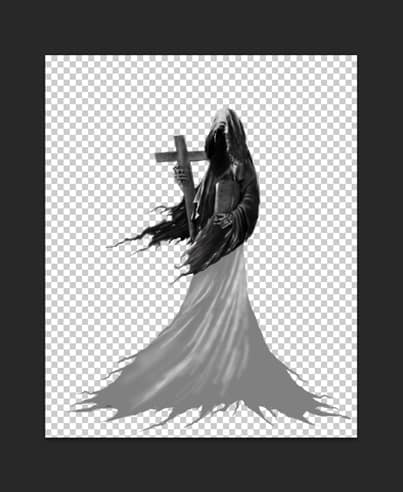
On this new layer give the cloth some shadow and highlight. We do this by applying dodge tool for the highlight and burn tool for the shadow. Here is the result I created will look like in normal blending.
Here is the one in overlay blending.
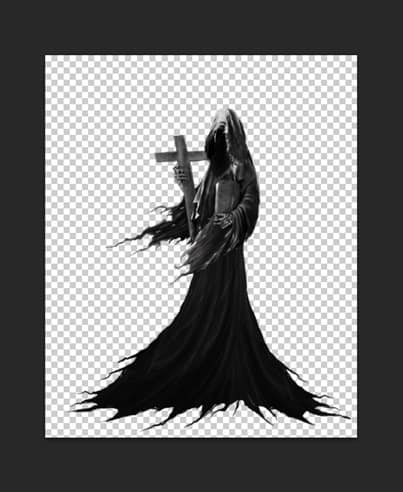
Finally, we will give some adjustment layer to this layer: level. Make sure to give this adjustment layer a clipping mask.
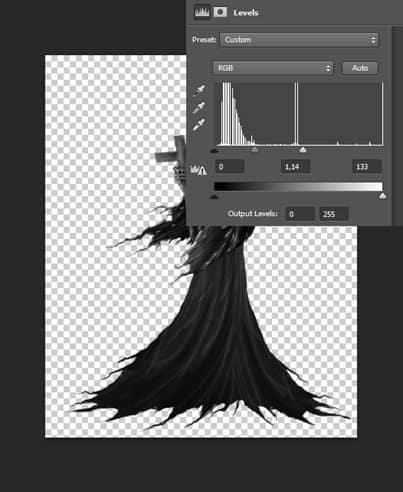
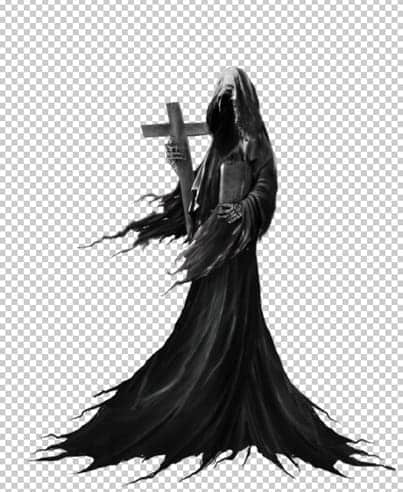
Step 12 (Final)
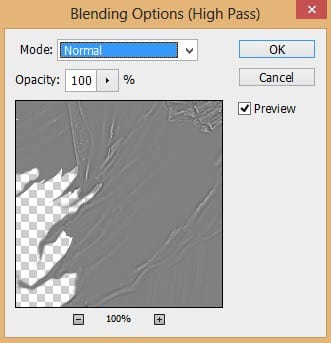
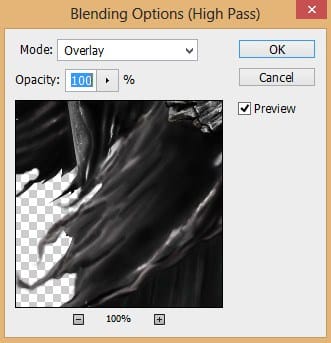
Merge all layers (Shift+Ctrl+Alt+E). This will create a new single layer . Give this layer high pass filter by going to filter > others > high pass. Set the value to 1-2 radius pixels. Set this to overlay to sharpen the image..
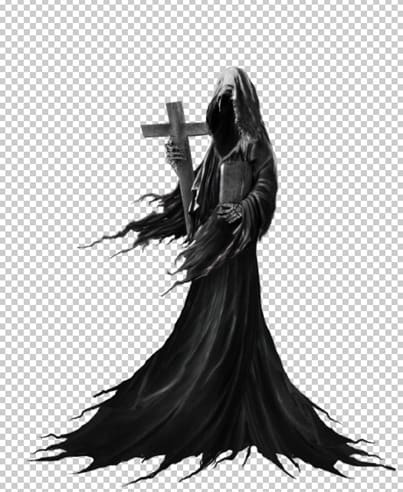
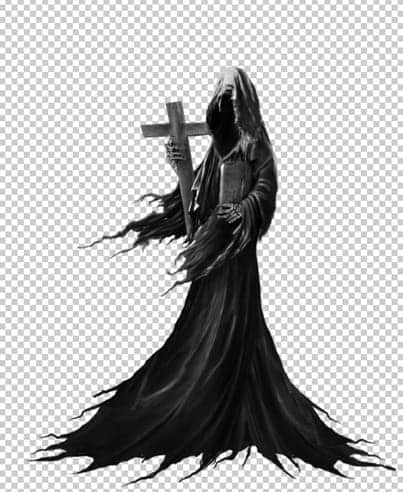
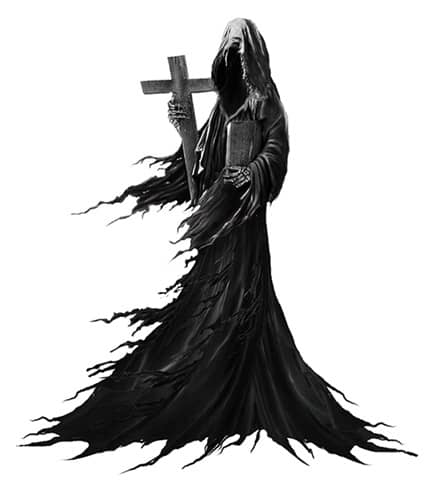
Here is the final result I created after adding some more torn on the lower cloth.
Step 13 (Document for the main scene)
This time we will create a new document for the main scene. Hit Ctrl+N and set the size as following.
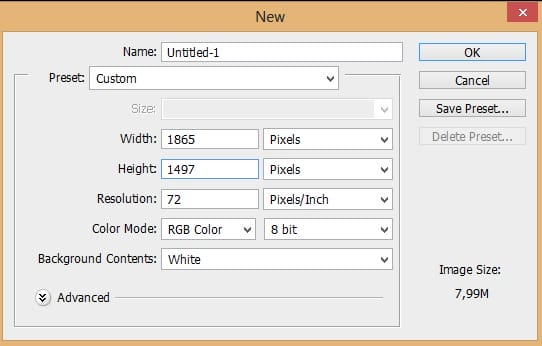
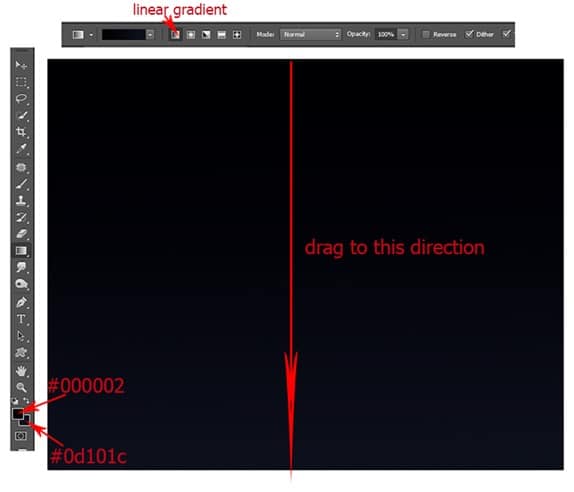
Next, we fill the document with linear gradient. To do this, firstly activate the gradient tool in the tool panel. Make sure to choose radial gradient in the option bar. Set the foreground color to #000002 and the background to #0d101c. Fill the document by hold-clicking the mouse right in the top center of the document and drag to the direction indicated by the red arrow in the screenshot.:
Step 14 (Adding smoke)
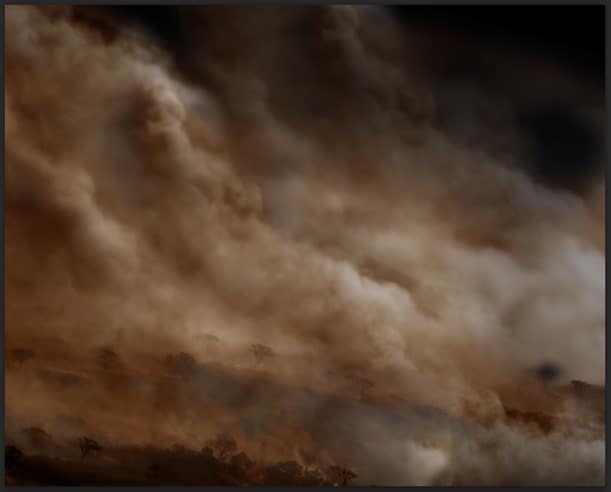
We create background for the scene. Firstly we will add smoke. We will use this stock image for the smoke texture.
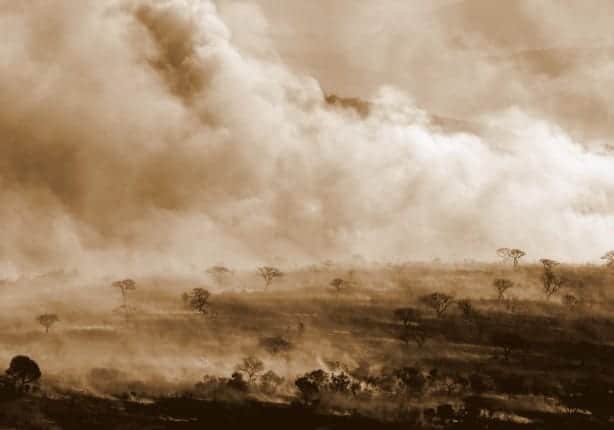
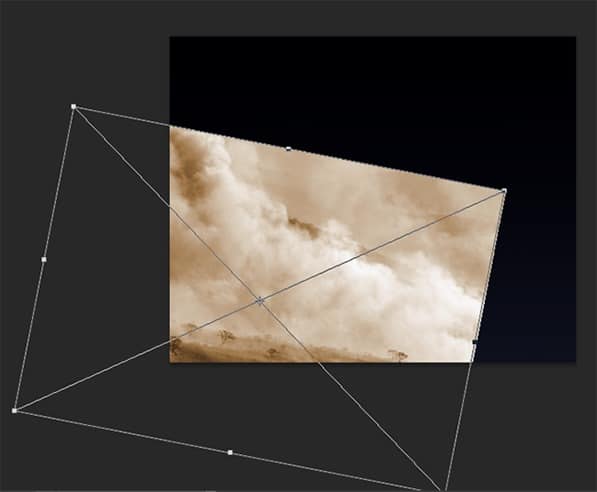
Attention please….!! It will be painful to create exactly the same result as the one I created not because that it involved sophisticated tricky techniques. On contrary, in this step, we will just use very simple common techniques like masking, filter and transforming. The tricky part is that it is really experimental so what I created here is only example for your inspiration to create similar one but not exactly the same one. Let’s start. Place the smoke image in the main document previously have been created. Scale and position it like below:
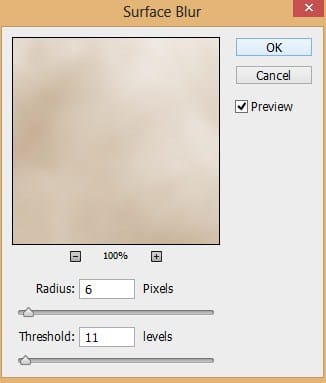
Go to filter > blur > surface blur
Mask some part where needed.
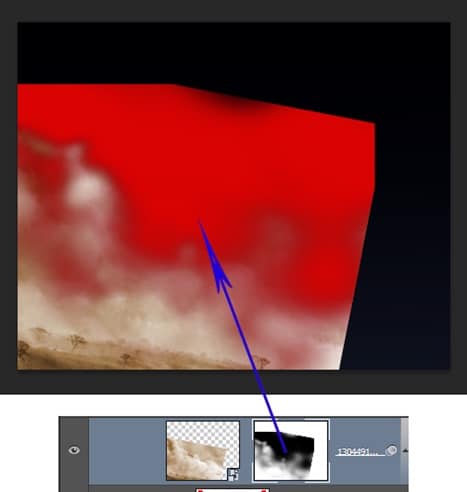
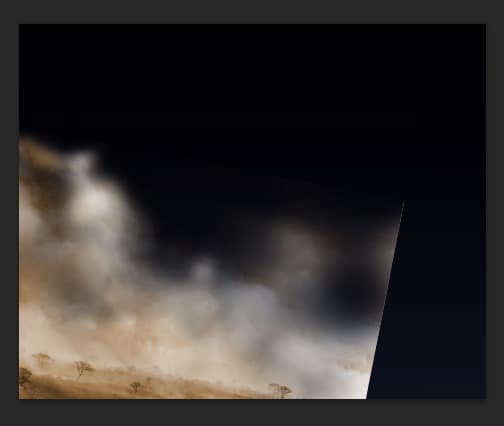
Next, we need to give this smoke layer an adjustment layer : levels. Make sure to give this adjustment layer a clipping mask.
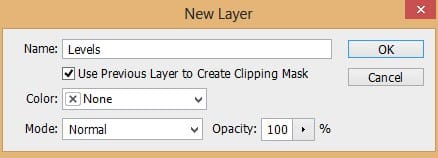
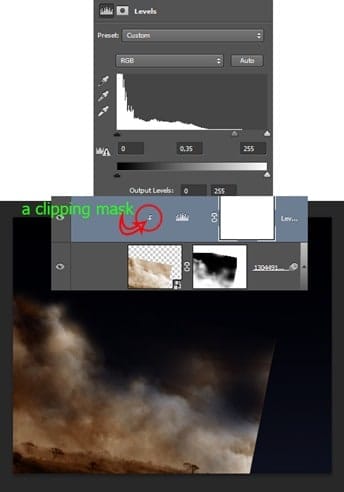
Now duplicate the smoke layer several times as needed and arrange and position the duplicates in such way. Do masking here and there, scaling and play around with opacity for each duplicated layer. Here is the one I created for your example after experiencing trial and error process ;-)
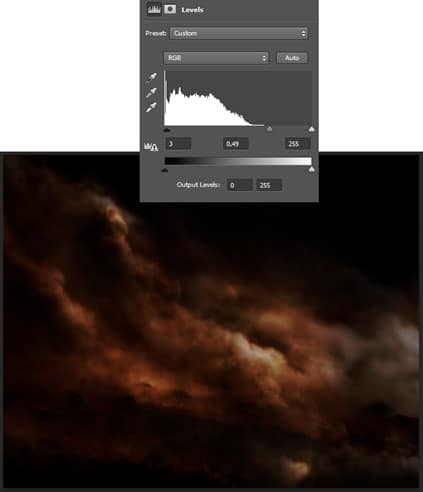
Next, give this smoke some adjustment layer: levels.
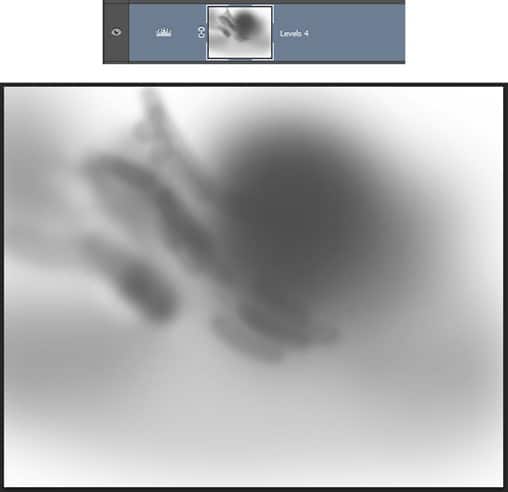
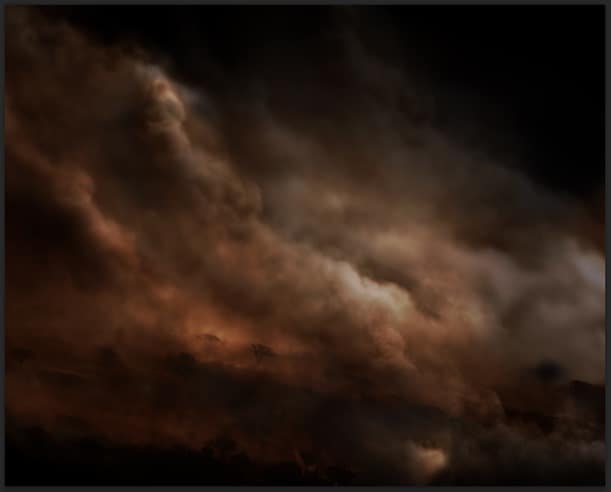
Mask the levels layer on some part. Here is the result of masking.
Step 15 (More adjustments)
Now we will desaturate the smoke by giving it hue/saturation adjustment layer. Make sure to place this layer above the levels layer.
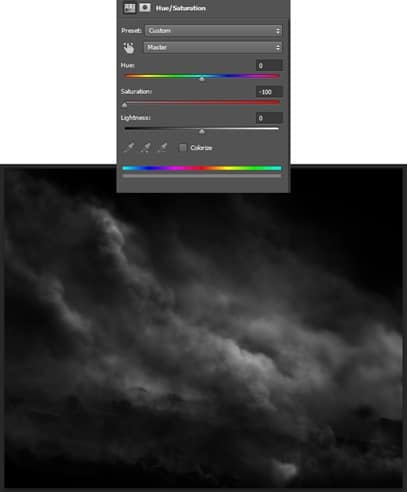
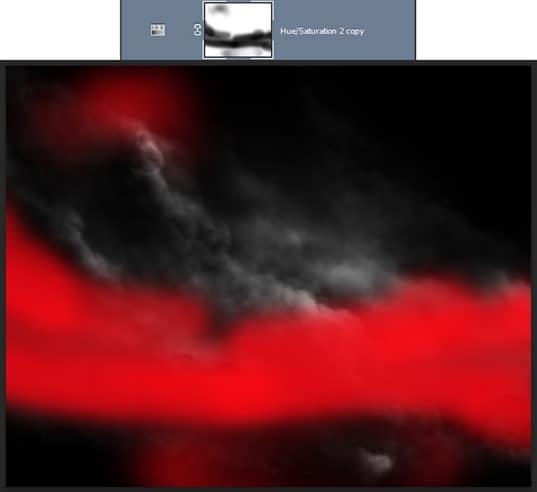
Duplicate this adjustment layer and set its blending to soft light at 85% opacity. Mask some areas of this layer to reduce its effect.
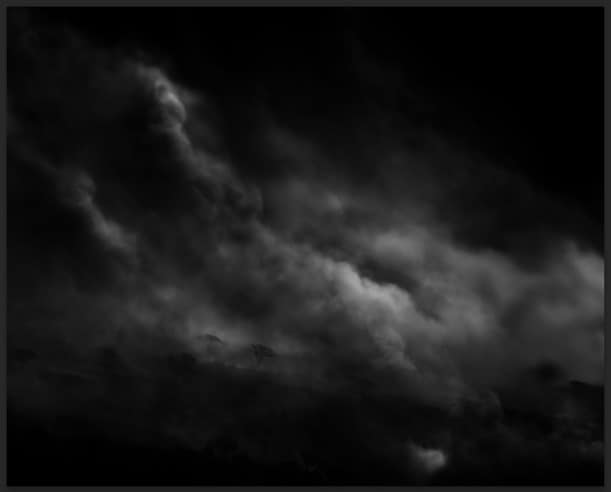
Step 16 (adding ground)
Next we will add ground for the scene. We will use this image for it.
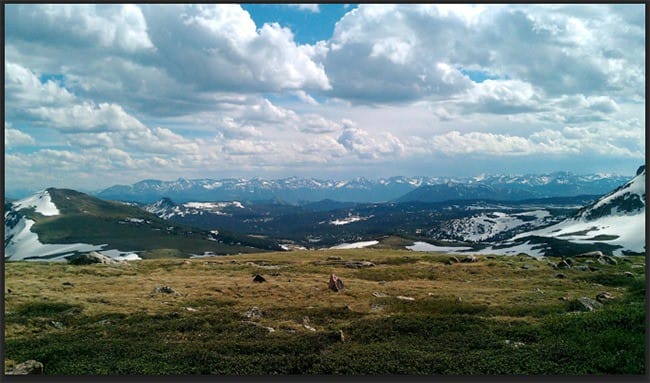
Place the image in the main scene. Scale and place it where needed. Make sure to locate this image below the two hue/saturation layers created in previous step 15. Because of its position below the layers, the image will be desaturated.
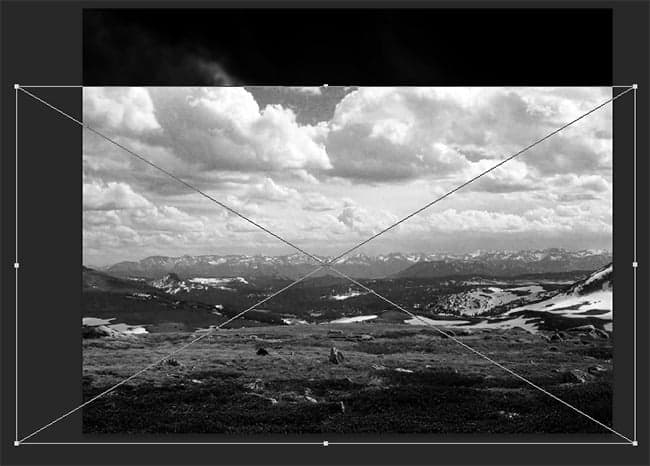
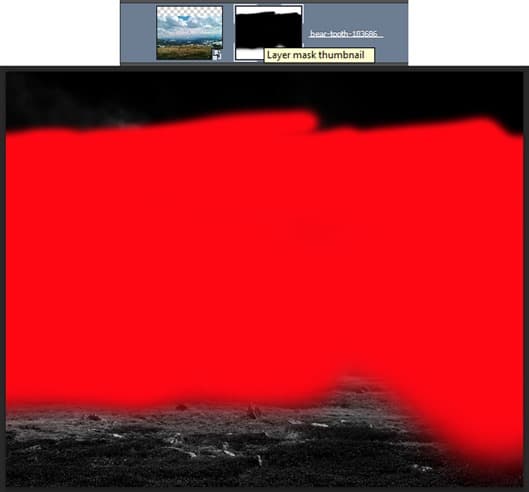
Then, mask the upper part of this image and let the ground revealed. We only need the ground part. The red highlighted part is where we should mask.
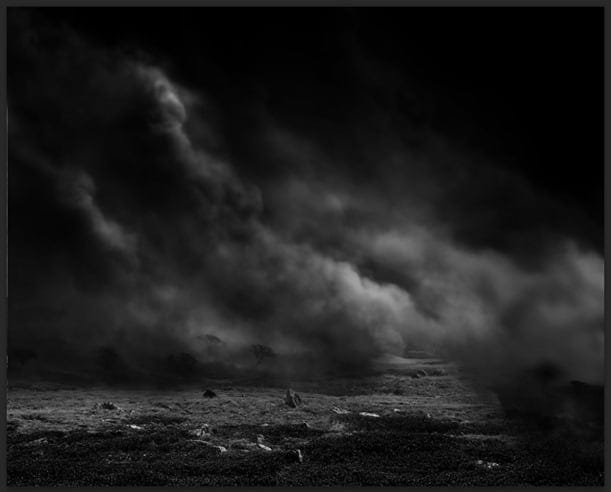
Step 17 (Creating misty ground)
To give some dramatic nuance to the scene, we will create misty ground for the scene. To get the misty effect, we will use this image.
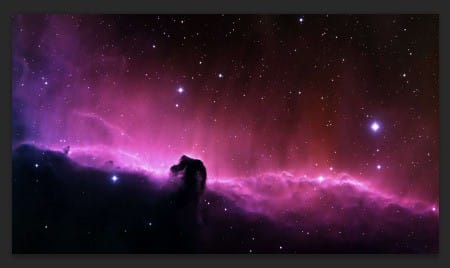
Place the image in the main document. Locate it below the hue/saturation layers. Scale its size and position it where needed.
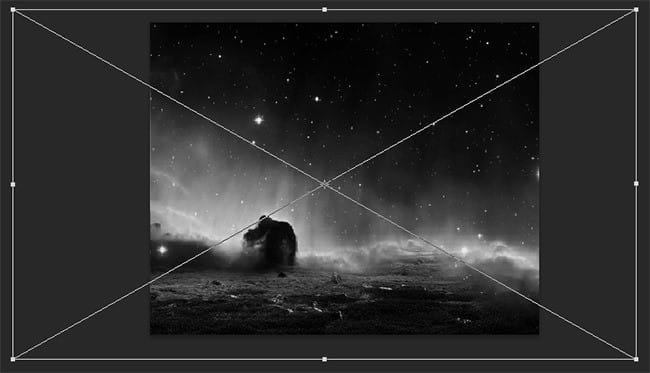
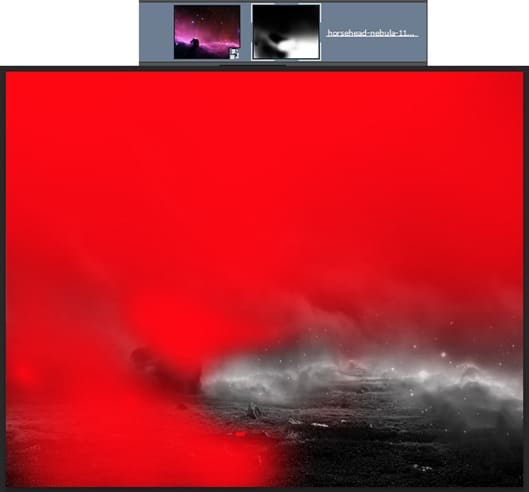
Proceed to mask parts unneeded. Take a look at the screenshot to find out what parts should be masked for this image. The red highlighted are parts where we should mask. Finally, set this layer to normal at 89% opacity.
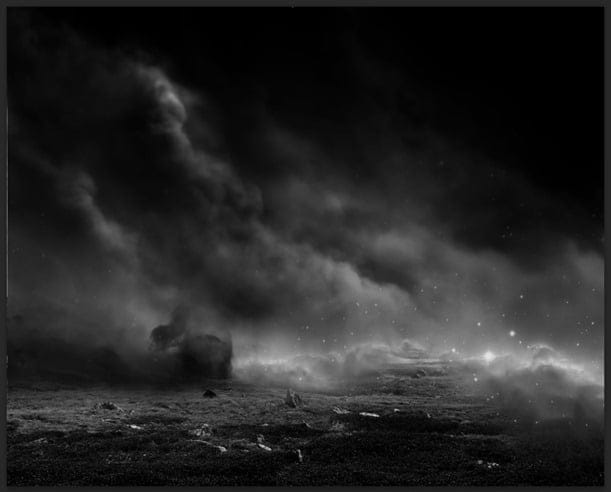
Here is the background I created so far…..
We will add some misty effect on the right side of the image as well. To do this, duplicate the nebula image. Place the duplicate as shown below.
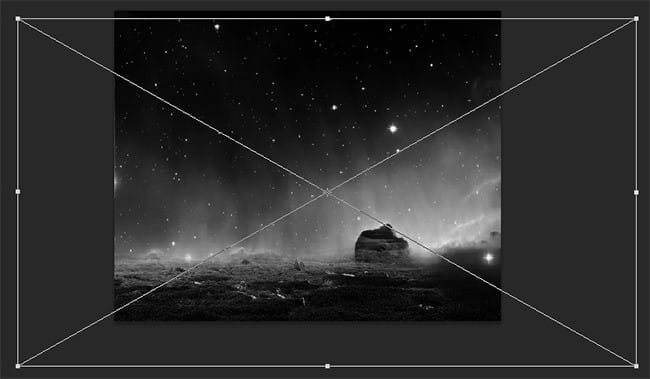
Mask parts unneeded. Finally, set this duplicate to normal at about 90% opacity.
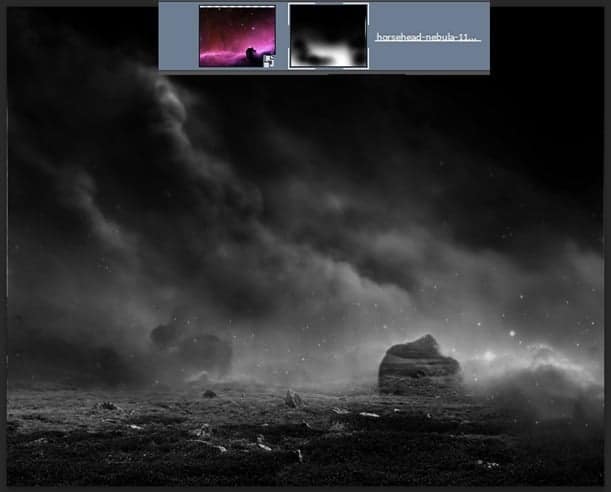
Step 18 (Light from above)
Next, we will add main light source for the scene. We will use the other nebula image for this purpose. Place the image in the main document. Scale its size and arrange its position in the upper left part. Make sure the position of this layer is below the two hue/saturation layers.
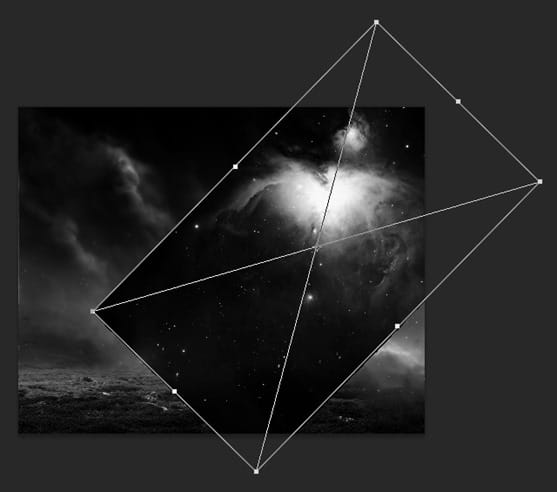
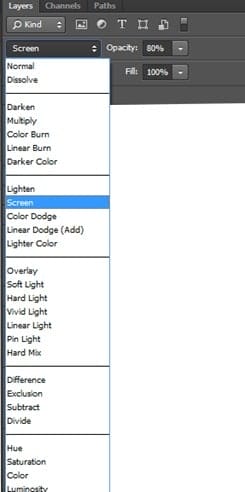
Set its blending to screen at about 80% opacity.
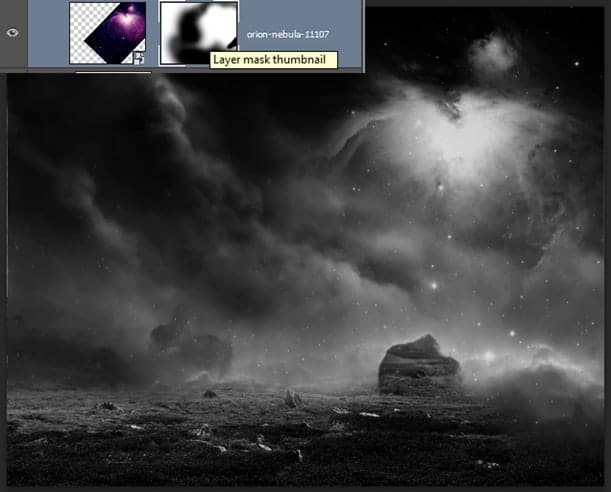
Mask unneeded part of this layer.
Step 19 (Adding the figure)
Finally add the figure to the main background. Place the image in the main document. Locate it above the hue/saturation layers. Scale and position it under the light source.
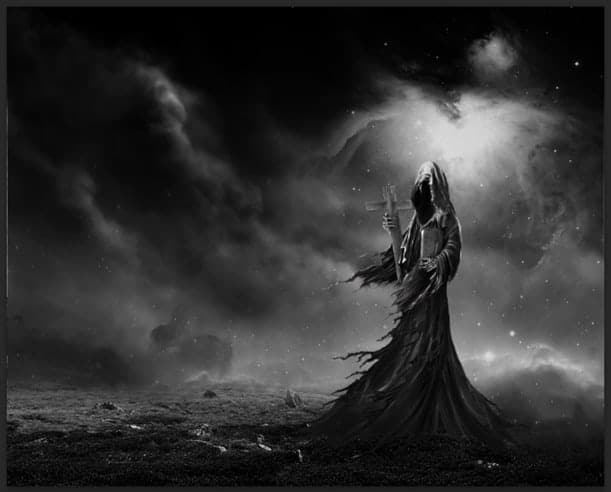
Step 20 (Preparing tombs)
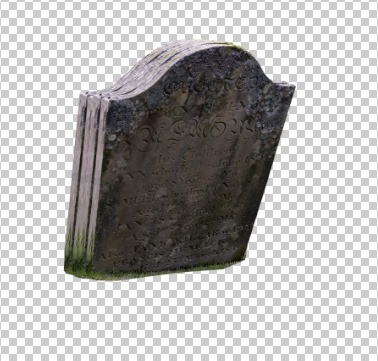
The background we have created is supposed to be a dark cemetery so we need some tombs on it. In this step we will create tomb for the scene. Open the tomb image and cut it out.
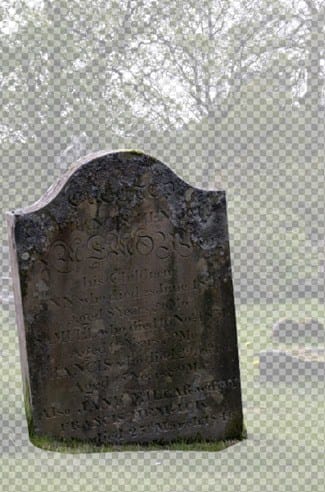
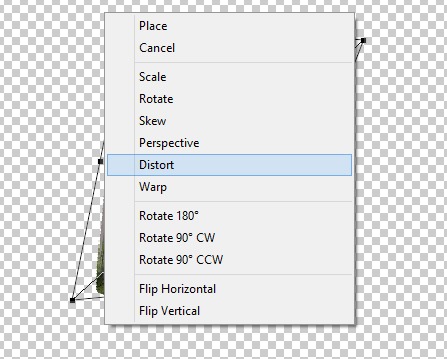
With the cut out selected, hit Ctrl+T to activate free transform tool. Right click on the canvas to show the transform option and choose distort.
Alter the shape of the cut out by distorting it. Click one of the transforming point (circled in red) and drag to the direction where needed.
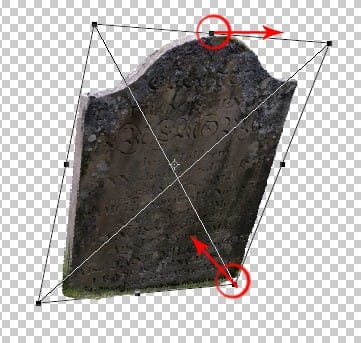
After finding the best result, duplicate the cut out 2 or 3 time. Arrange the duplicate to make the tomb thicker. Finally, select all the tomb layers and merge them into a single layer.
Step 21 (adding tombs and other objects to the main scene)
Now add the tomb to the main scene. Duplicate the layer and place them as the foreground objects for the scene.
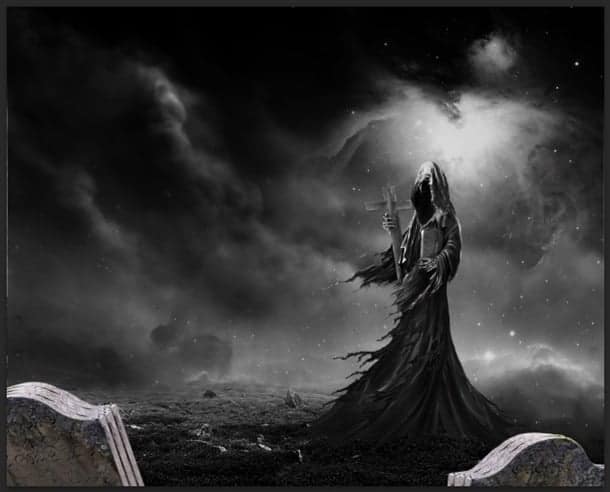
Add the original cut out
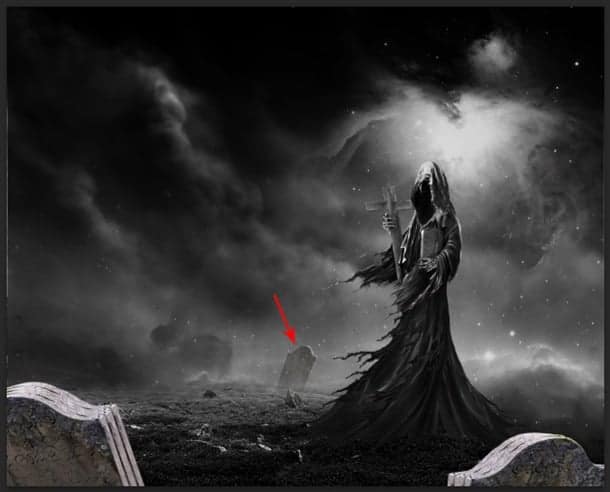
More tombs
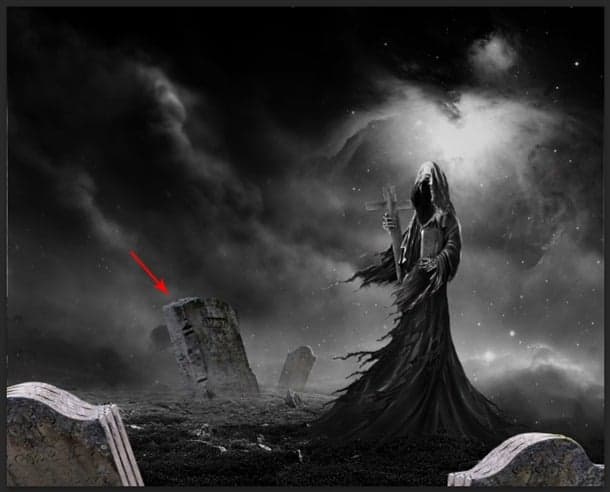
I think we will agree if we add some skeleton……
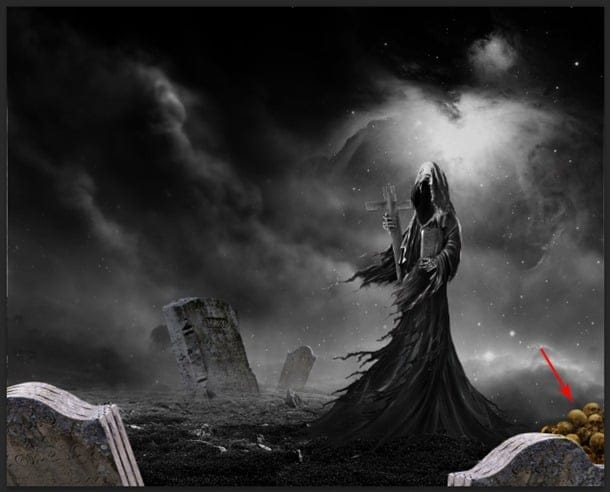
Make sure that we have downloaded the candle image. Cut out the candle and place the cut out to the main scene. Arrange and locate the candles where needed. Here is the scene will look so far…….
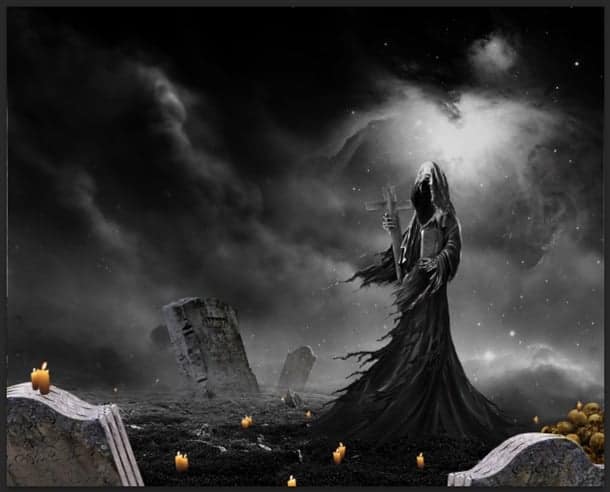
Step 22 (Adjustments to the objects in the scene)
Foreground Tombs
Firstly, we will do adjustment to the foreground tomb. Go and select again the right foreground tomb layer to be active on it. Then give this layer two adjustment layers with clipping masks : hue/saturation and photo filter.
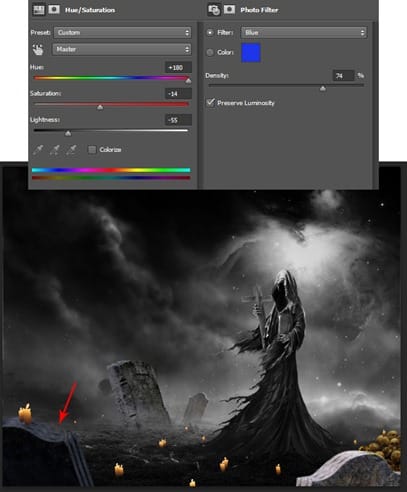
Create a new layer above the two adjustment layer with a clipping mask filled with 50% gray and set its blending to overlay at 100% opacity. Take the dodge tool and choose a very soft round brush to paint some highlight on the tomb pointed by the red arrows.
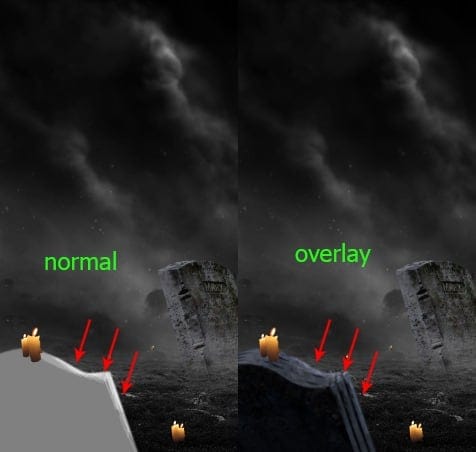
Do similar ways for the other foreground tomb.
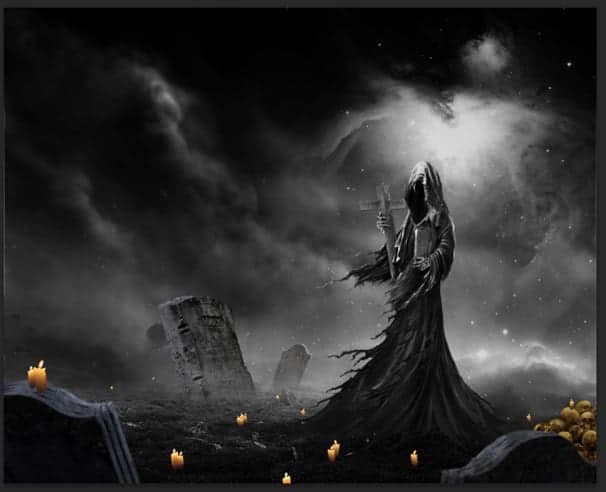
Background Tombs
Next select the main background tomb to be active on it. Create a new layer with a clipping mask above this layer. Take a very soft round brush set to 10% opacity. On this layer paint soft white color to give the tomb some highlight. Give this layer some Gaussian blur. Go to filter > blur > Gaussian blur. Set the value to about 1-2 pixels. Give the farther background tomb 1-2 pixels Gaussian blur as well.
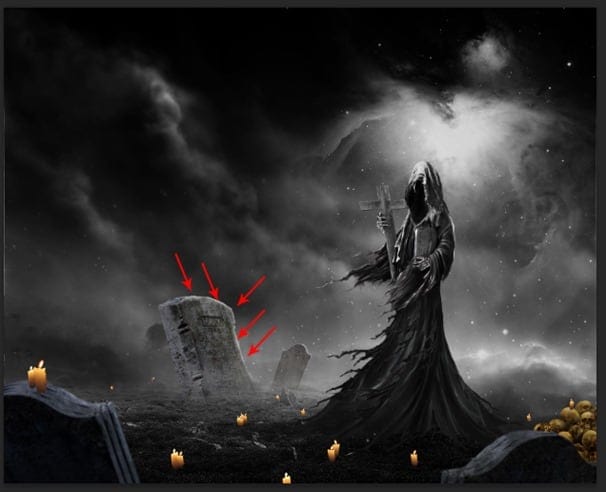
Skeletons
Then, proceed to give the skeleton layer some adjustments. Make sure to be active on this layer. Give it hue/saturation adjustment layer with a clipping mask. Duplicate the hue/saturation layer one time. Set the main layer to normal at 100% opacity and the duplicate to soft light at 100% opacity.
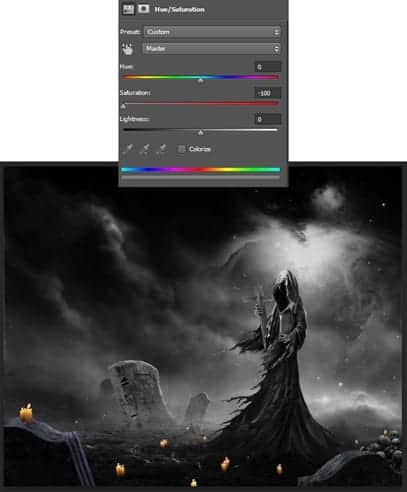
With similar step in adding highlight on the background tomb, do the same way to add some highlight on the skeletons where needed.
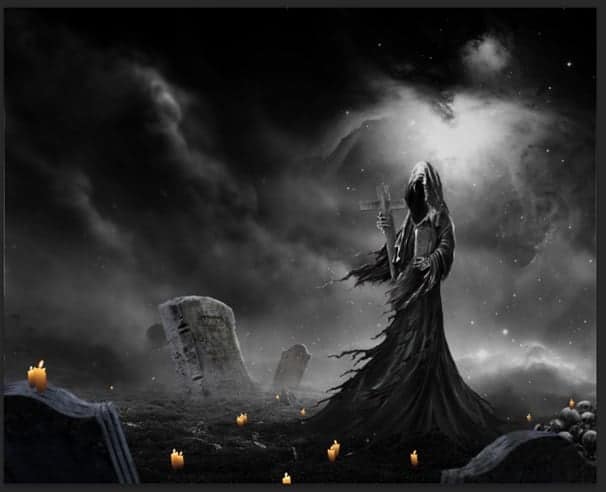
The Ground and Adding More Graveyards.
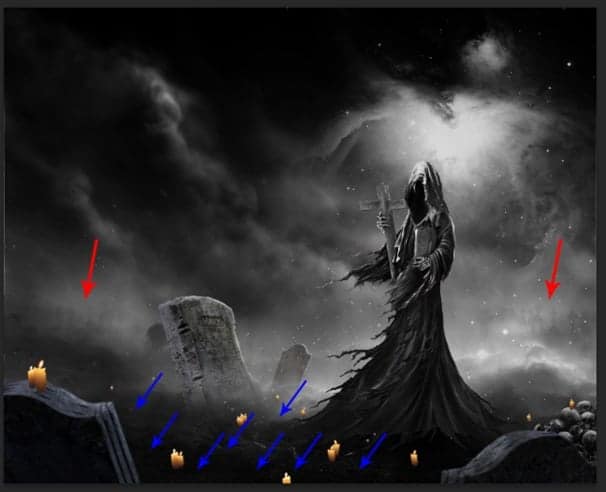
I decided to make the ground less visible so I reduce the opacity of the ground layer to about 60% opacity and do some more transparent masking on it. Here is the result I created for the ground now indicated by blue arrows. Finally, I decided to add distant graveyards on the left and right side of the scene pointed by red arrows.
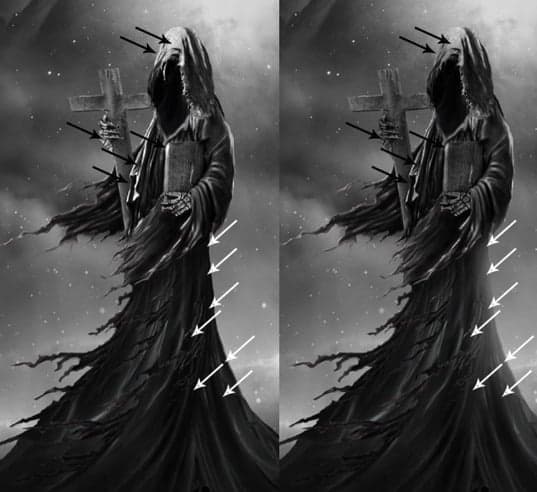
The Figure
Finally we will do some adjustment for the figure. Go and be active on the figure layer again. Create a new layer with a clipping mask above the layer. On this new layer we will paint some highlight and shadow for the figure. To do this, take a very soft round brush set to 10-15% opacity. Paint soft black and white color to areas on the figure to give it the shadow and highlight. The pointing black arrows indicate where we should paint some shadow while the white ones show us where the highlight should be painted.
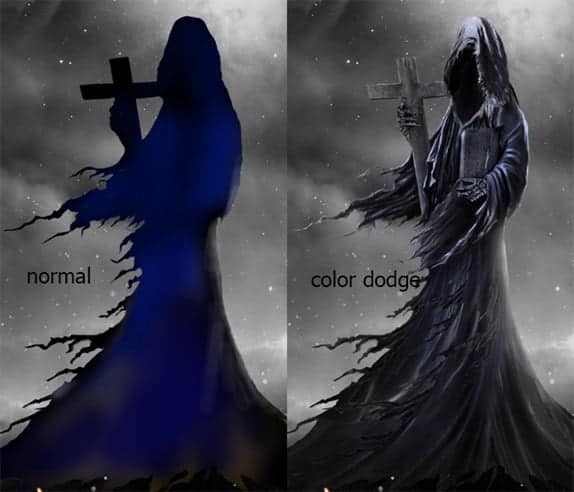
Next, create another new layer with a clipping mask filled with black. Set this new layer to color dodge. Take a very soft round brush and paint some soft blue color on the figure. Here is the normal and color dodge blending of this layer will look for our inspiration where we should paint the color.
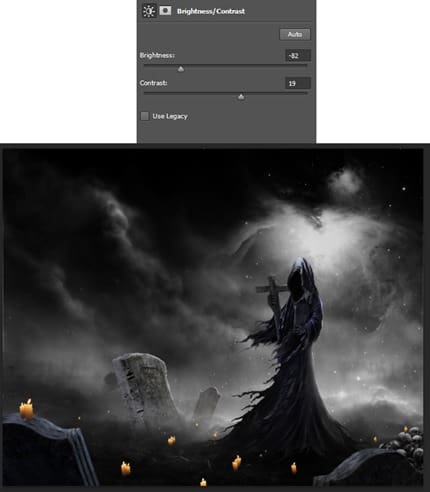
Finally, give this figure an adjustment layer: brightness/contrast. Here is the result I created.
Step 23 (Overall highlight and shadow)
Create a new layer above all the other layers. Fill this layer with 50% opacity set to overlay blending. With combination use of the dodge and burn tool paint highlight and some shadow on the smoke and light source areas. Here is the normal blending of this layer will look.
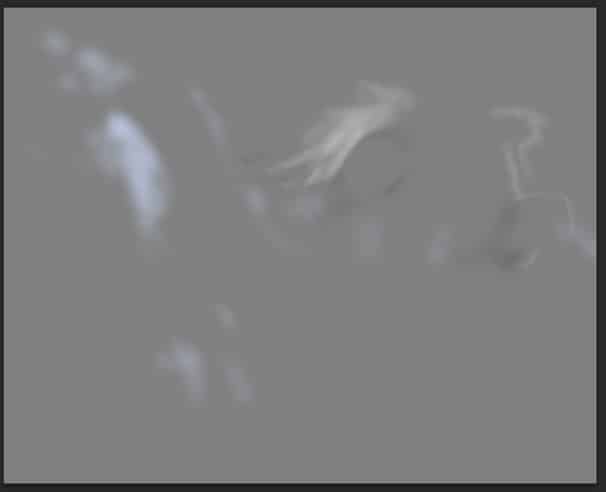
Here is the result in overlay blending at 100% opacity.
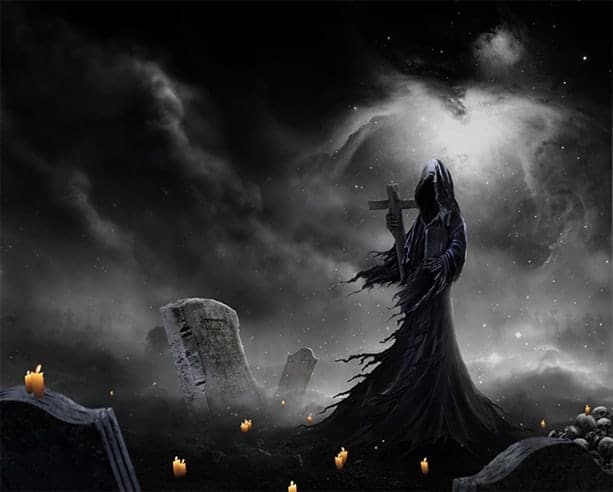
Step 24 (Overall adjustments)
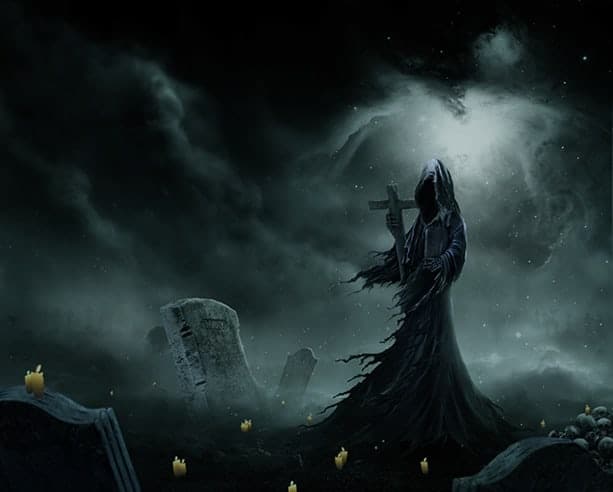
Finally, we will set overall adjustments for the scene. What we should do is create a new layer above all the other layers and fill this layer with solid color of #033335. Set the blending of this layer to multiply at about 45-50% opacity.
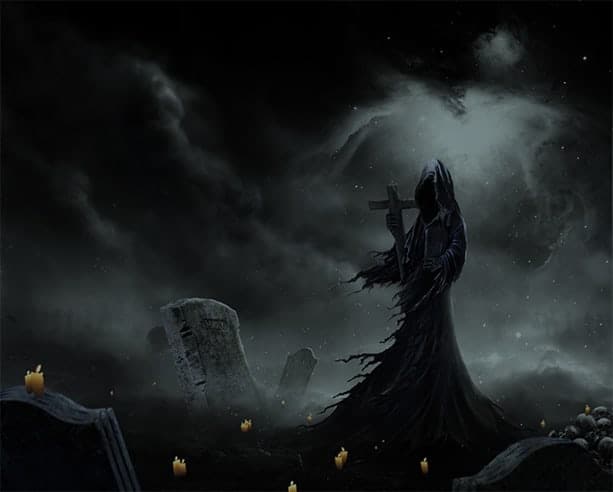
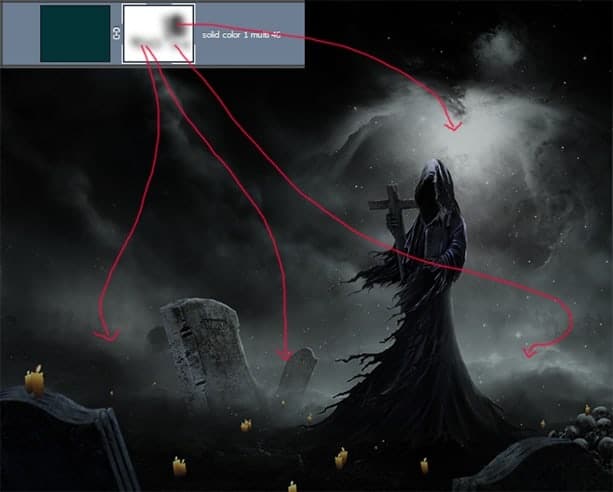
Mask some parts of this layer as indicated below. Make sure to use a very soft round brush set to low opacity of 10-15% to do masking to be able to determine how transparent the masking will be.
Proceed to create a new layer again above the previous solid color layer. Fill this new layer with solid color of #43f6f4. Set this layer to soft light at 20% opacity. Finally, mask a bit on the light source area.
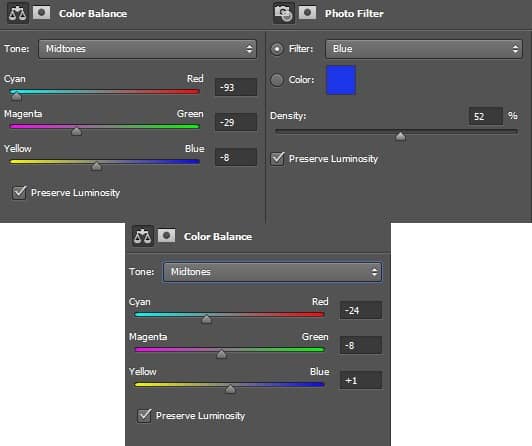
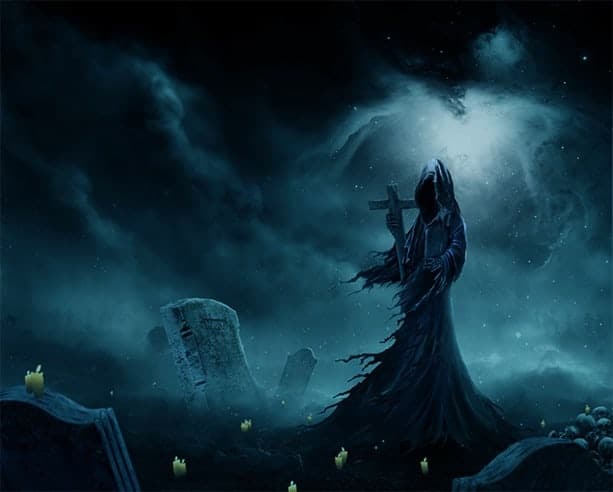
Next we will add some adjustment layers to the scene. Firstly we will add color balance set to normal at 65-70% opacity. Next we give it photo filter set to soft light blending at about 20% opacity. Finally, we give it another color balance set to normal at 100% opacity. Take a look at the screenshot to find out the values of each adjustment layer.
Step 25 (Light on the candles and more highlight)
In this step we start to give some highlight on the ground. To do this, create another new layer above all the other layers. Fill this layer with black and set its blending to color dodge. Take a very soft round brush set to a very low opacity of about 3-5% opacity. With that brush, paint yellowish orange color to the areas on ground where the highlight should fall. Give some soft white color to areas where needed as well. Here is the normal blending of this layer I created.
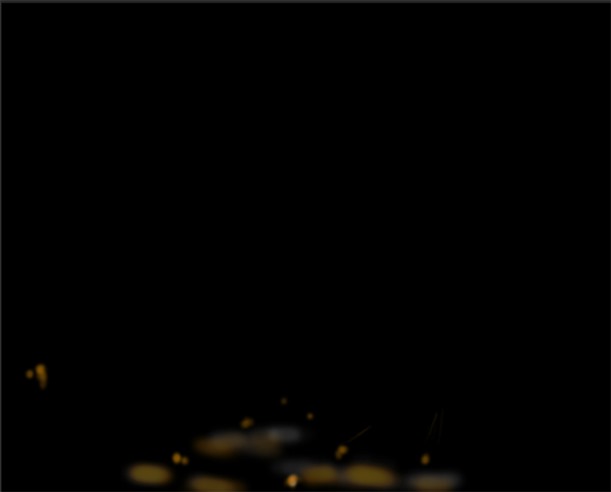
Here is the result in color dodge at 100% opacity. We can duplicate the layer to give more vivid color and play around the opacity to get desired result.
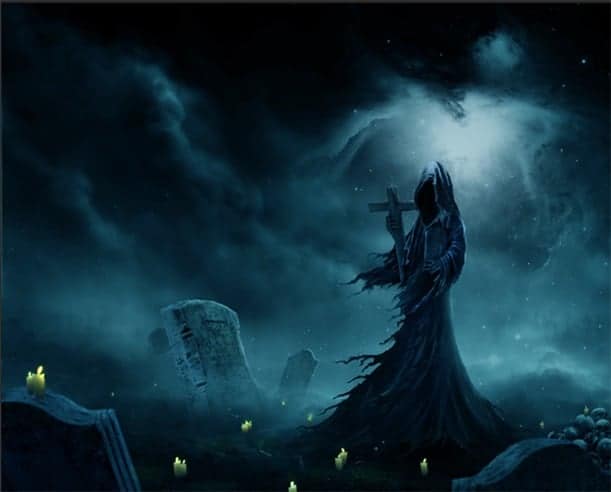
Create again a new layer. Set this layer to hard light blending. Paint some light for each candle on this layer. Use color of #fc9502. Here is the result I created in normal blending:
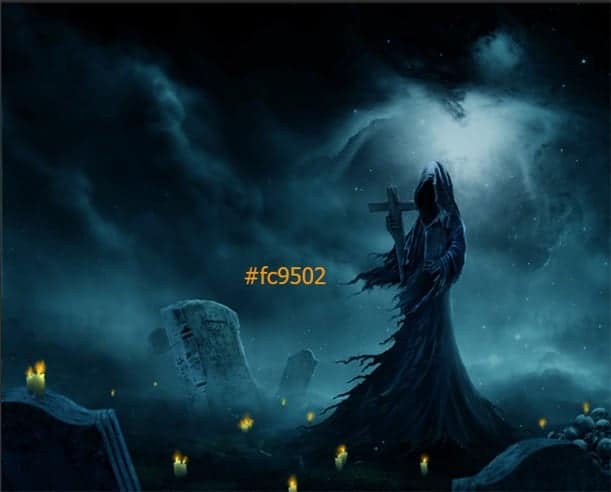
Result should be in hard light blending at about 70% opacity.
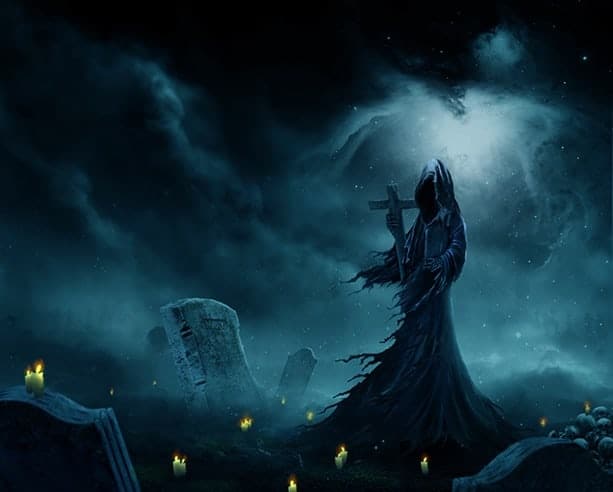
And ………create again a new layer above the previous layer (don’t worry it is the final new layer ;-) Set this layer to linear light blending. With the same color paint soft highlight on the tombs. Don’t forget to add some shadow for the candles. Use soft black color for this purpose. Here is the result.
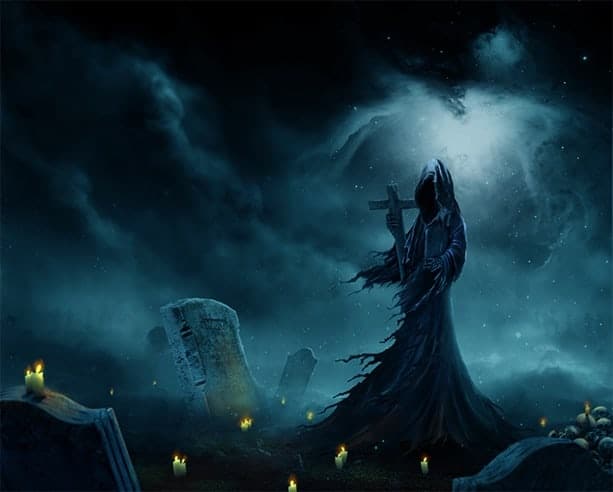
Step 26 (Filters)
Make sure we are active on the topmost layer in the layer panel. Hit Shift+Ctrl+Alt+E to merge all visible layers into a single layer. Go to layer > smart objects > convert to smart object. This will change the status of this layer into a smart object layer. Next go to filter > oil paint. Here is the values :
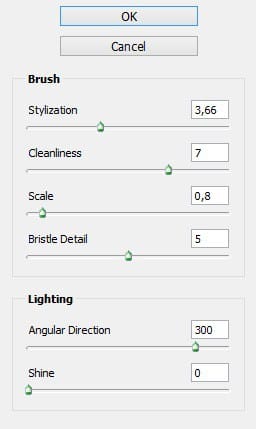
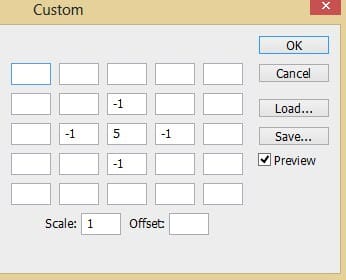
Give another smart filter : custom. Set the value below. Set the blending option for this smart filter to normal at 50-60 opacity.
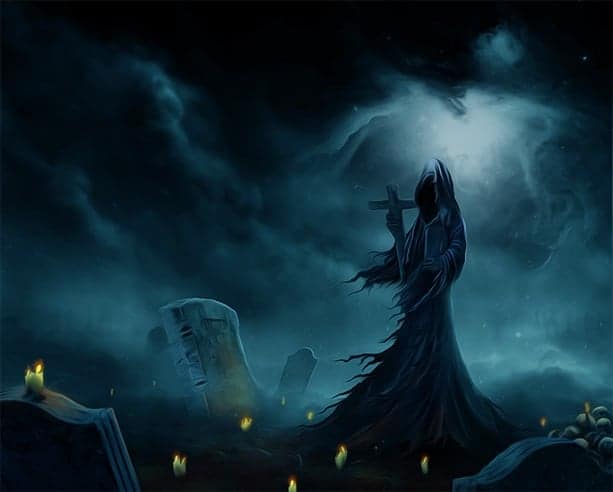
Result after filtering :
Go select the smart filter mask thumbnail to be active on it. Mask the effect of the filters to some areas as highlighted in red.
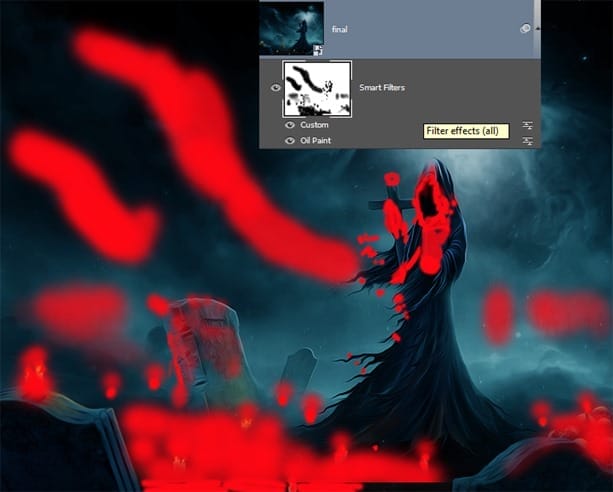
Result after masking :
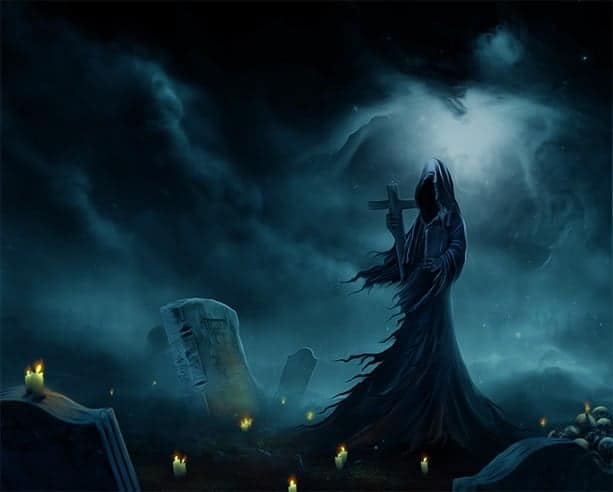
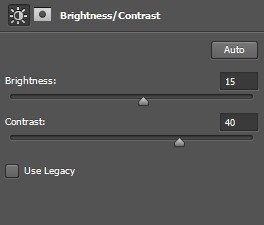
Finally give this layer an adjustment layer : brightness/contrast.
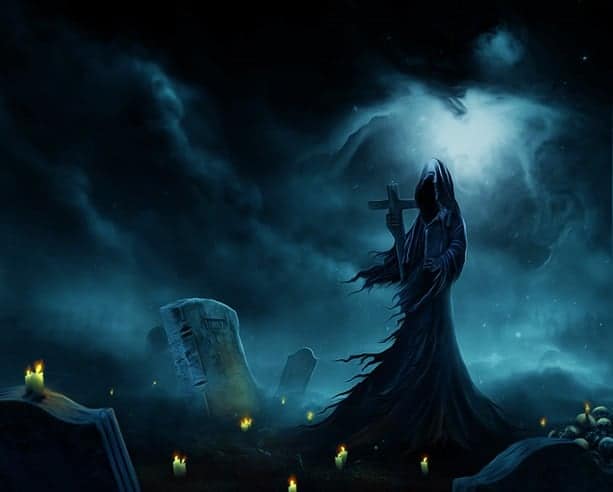
Here is the result should be:
Final Results
![final result[1] final result[1]](http://www.photoshoptutorials.ws/wp-content/uploads/2014/06/finalresult1.jpg)
0 comments:
Post a Comment