Thursday, 19 May 2016
Thursday, 27 November 2014
Final Image

Tutorial Details
- Program : Photoshop CS3 +
- Estimated Completion Time : 30 minutes
- Difficulty : Beginner
Resources
Step 1
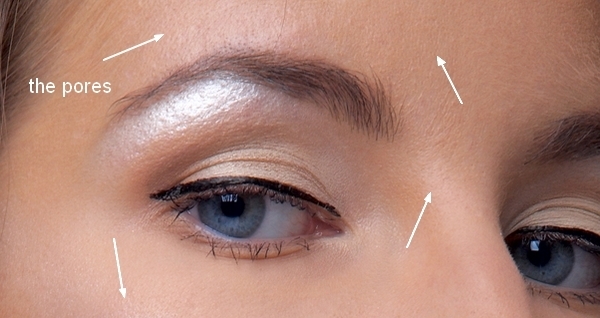
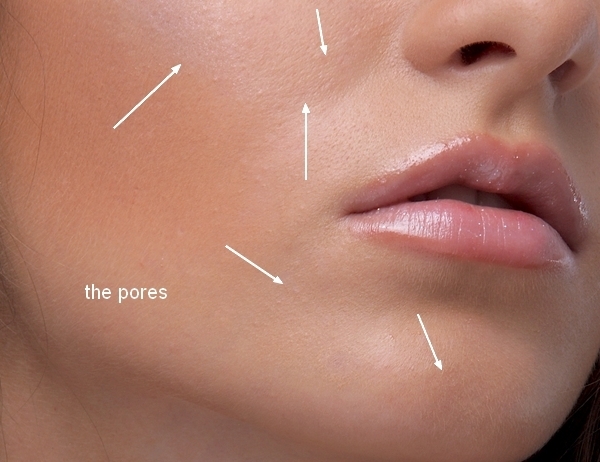
Prepare your model photo. Don’t choose the model with soft skin or much retouched ones. You should use the pictures with hight quality and the pores must be seen clearly. The process of retouching is not the same on every picture, it depends on your aim and the model in it. With my picture, I’ll be giving the model a natural touch, not a heavy make-up. You can see some close-ups of the pic I’ve chosen for this tutorial:
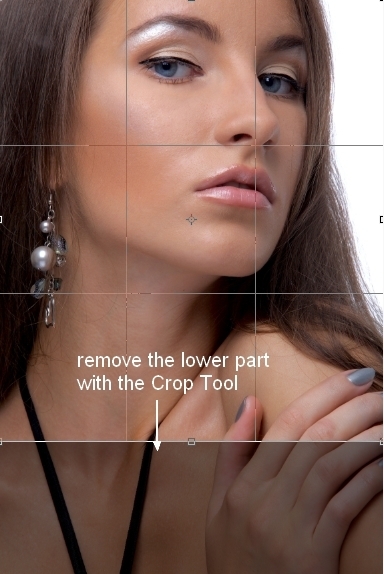
Press C to active the Crop Tool. We’ll remove the lower part of the model body to focus on her face.
Step 2
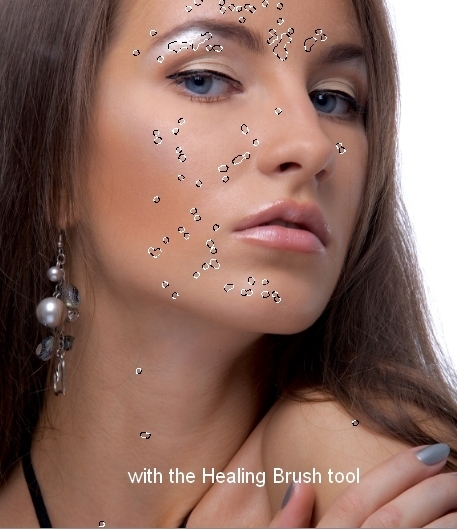
Press Cmd/Ctrl+Shift+N to make a new layer. Active the Healing Brush Tool (J) with the settings below:
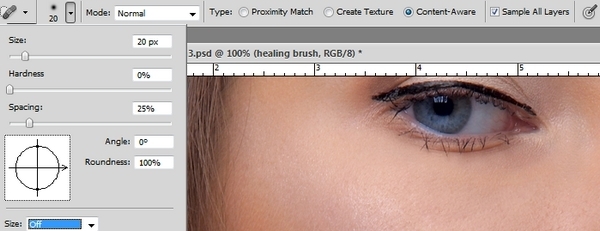
If you use Photoshop CS3 or CS4 you can check Proximity Match option.
Use this tool to remove the wrinkles, acnes or unwanted details to clean the face. Here are the parts I’ve worked on with this tool:
Use this tool to remove the wrinkles, acnes or unwanted details to clean the face. Here are the parts I’ve worked on with this tool:
Step 3
Hit Cmd/Ctrl+Option/Alt+Shit+E to merge the background and the healing brush layer into a new one. Convert this layer to a Smart Object so you can apply the filters to it in non-destructive way.
To give the skin a more visible look, I used the Unsharp Mask filter.
Go to Filter > Sharpen > Unsharp Mask:
Go to Filter > Sharpen > Unsharp Mask:
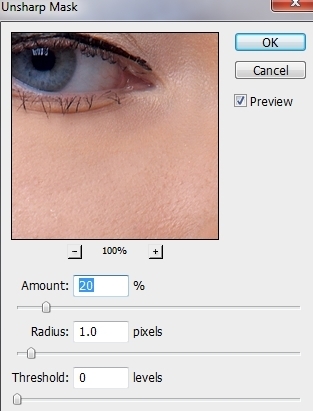
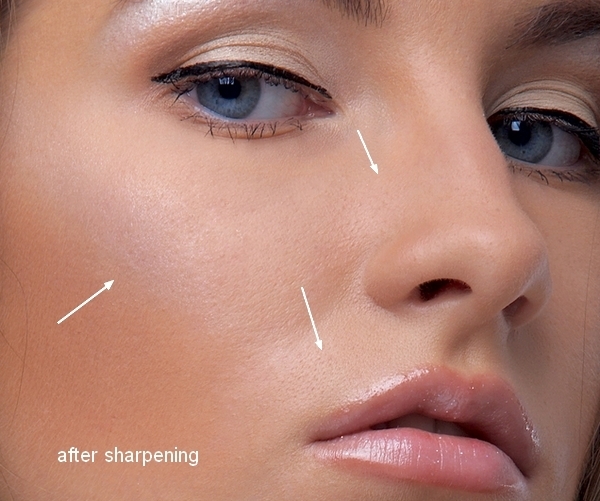
The values depend on your model skin sharpness. Drag Amount, Radius and Threshold until you get the desired look but remember we’re in the first steps so don’t adjust the skin too much. Don’t sharpen it if it’s sharp enough already.
Step 4
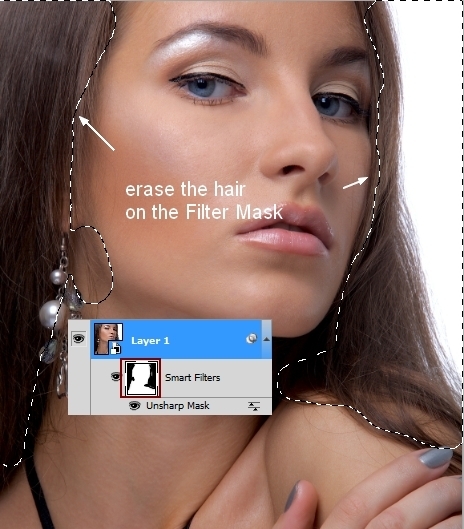
On the Filter Mask, use a basic, soft brush with black color to erase the hair part as we don’t want it too sharp.
Step 5
Merge the layers again and convert this layer to a Smart Object. Go to Filter > Other > Custom:
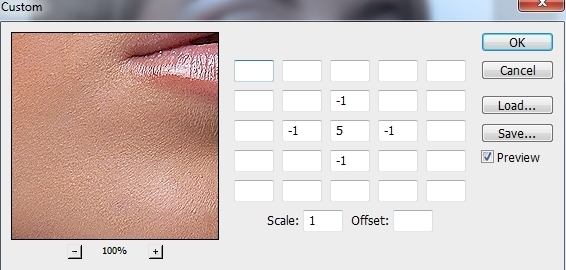
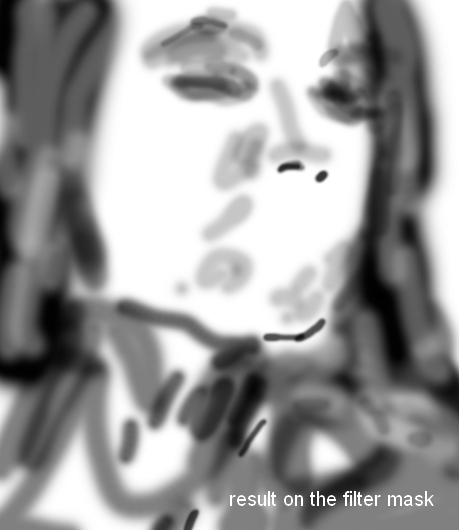
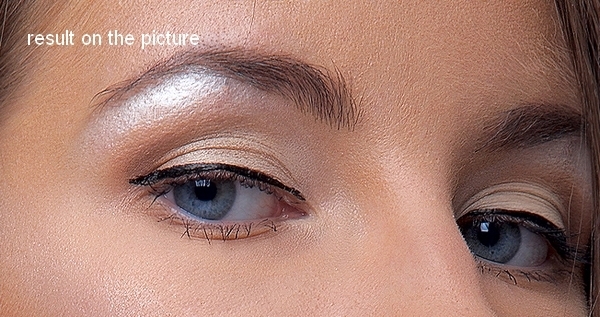
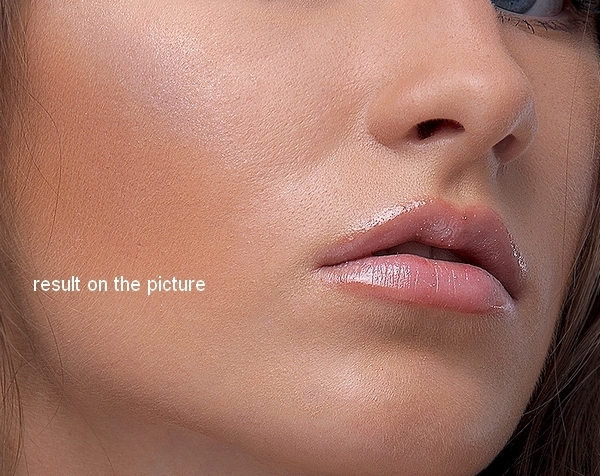
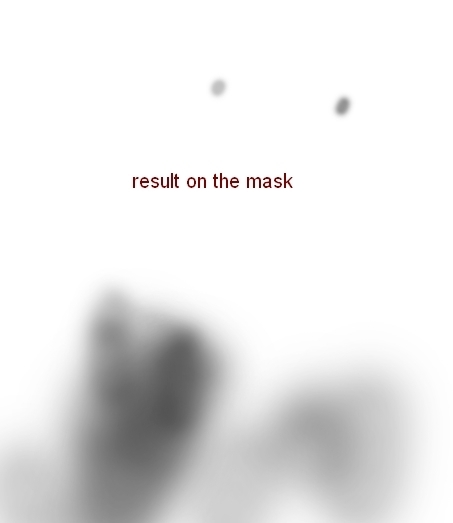
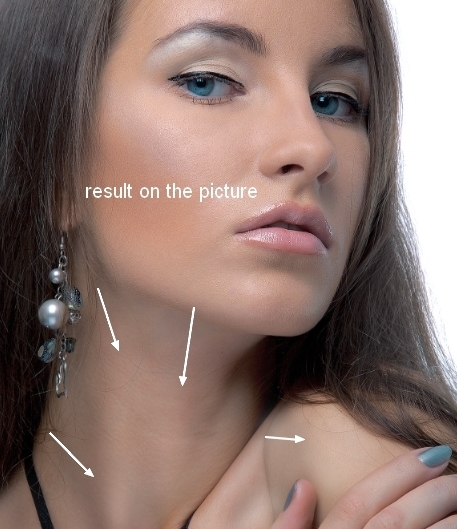
On its Filter Mask use a soft black brush to reduce or remove the effect on the hair, lips, eyes, contours of the face, nose or wherever you find too much sharp than you expected. You can see how I did it on the mask and the result on the picture:
Step 6
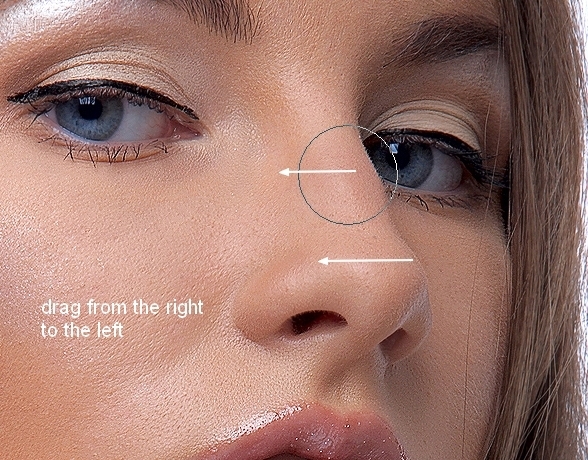
Merge all visible layers. I’ve found that the model nose looks rough. To correct it, choose Filter > Liquifyand choose the Forward Warp Tool:
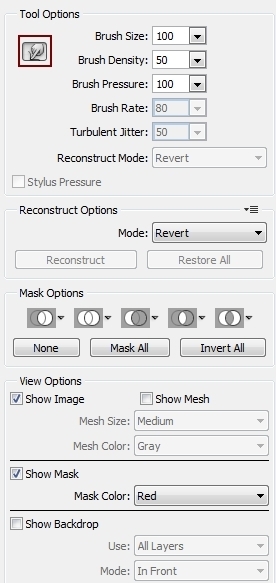
Use this tool to drag the nose contour from the right to the left:
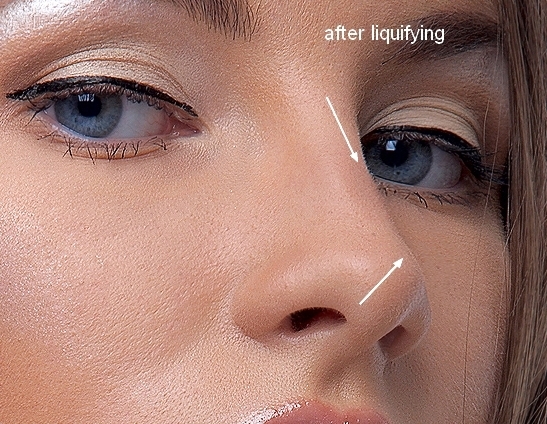
Here is the result you should get:
Step 7
To soften the neck (don’t forget this area!) I made a new layer and used a soft brush with the color#e3d1c7 (picked from the model skin), opacity and flow about 30-35% to paint on the indicated part:
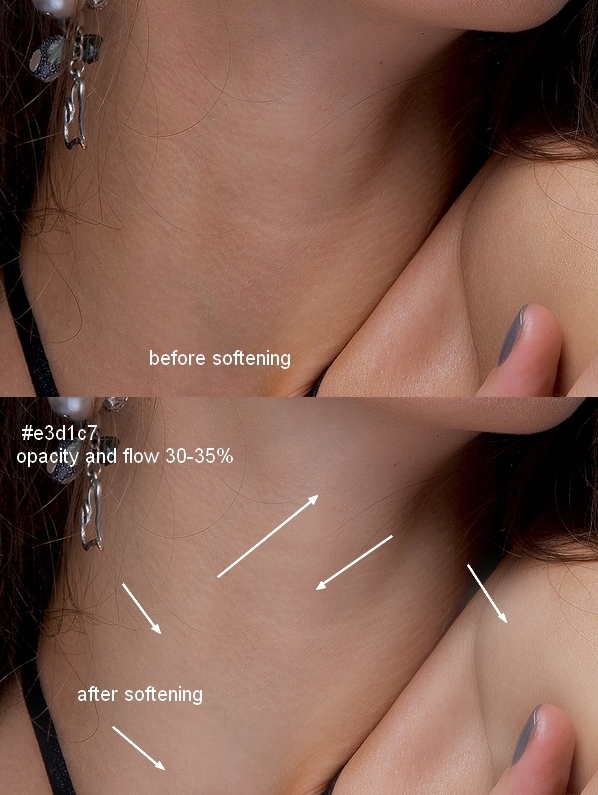
Don’t overdo it as you can loose the details.
Step 8
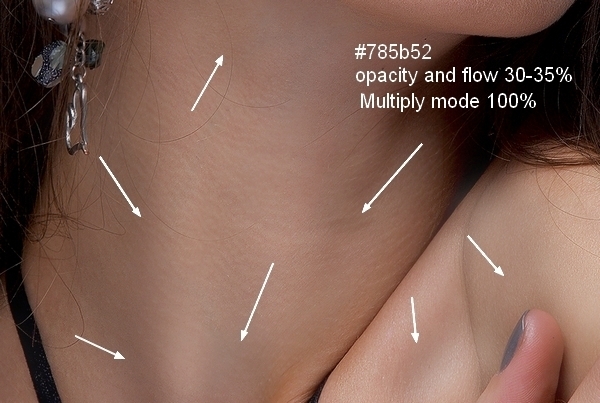
To add some shade to the neck I used a new layer, the soft brush with the color #785b52, opacity and flow 30-35% then change the mode to Multiply 100% :
Step 9
I used an adjustment layer to change the color of the model. Go to Layer > New Adjustment Layer > Selective Color:
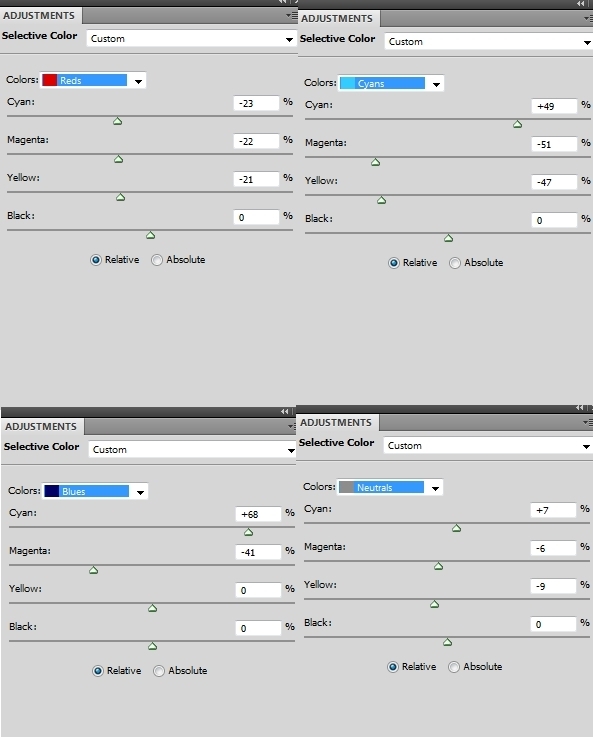
Notice that I changed the cyan and blue settings for the model eyes. If yours doesn’t have these colors, don’t adjust them. Also remember that the settings below (and in next steps) are only reference and you can always adjust them to suit your model.
On the Selective Color layer mask use a soft black brush with the opacity and flow about 30-35% to reduce the effect on the neck, the shoulder and the eyes:
Step 10
I used a Color Balance adjustment layer for the pic:
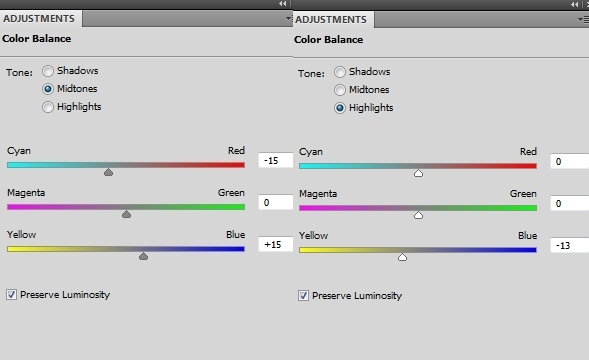
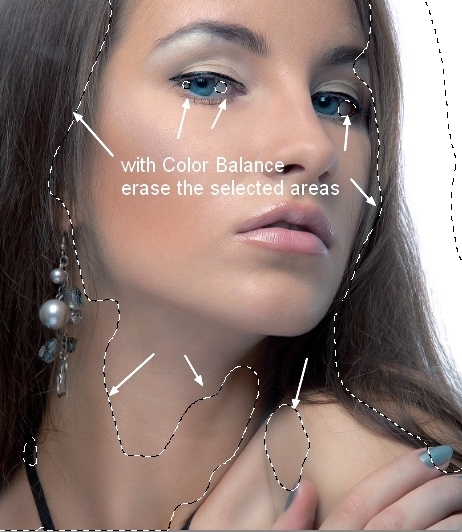
On this Color Balance layer mask use a soft black brush to remove the cyan cast on the hair, the neck, the shoulder and the eyes:
Step 11
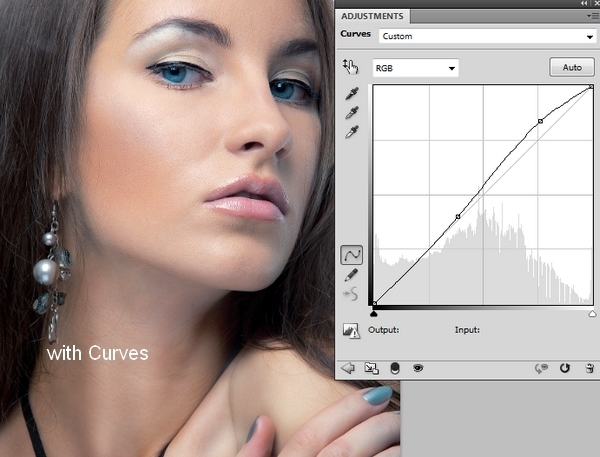
I made a Curves adjustment layer to increase the contrast and highlight of the model:
Step 12
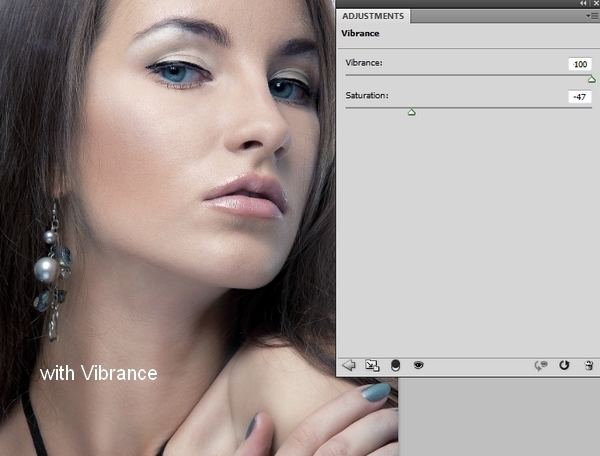
I used a Vibrance adjustment layer to desaturate the model color:
Step 13
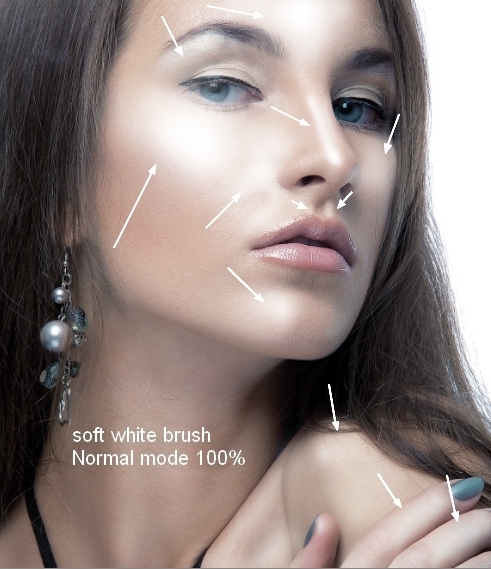
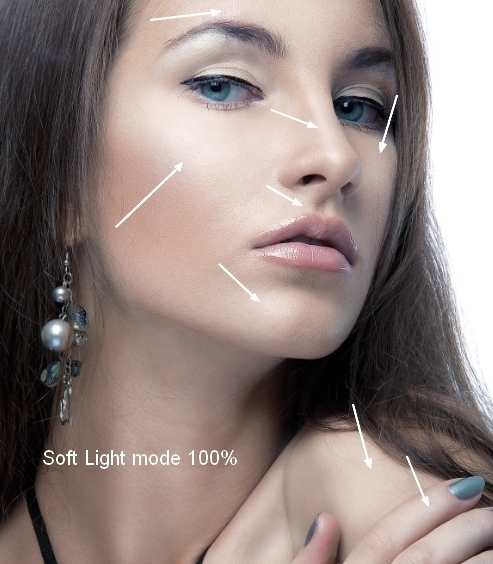
To add more light to the model I created a new layer, use a soft brush with white color to paint on the checks, forehead, nose, chin, above the lips (paint on the parts illuminated in your picture). Set the mode of this layer to Soft Light 100%:
Step 14
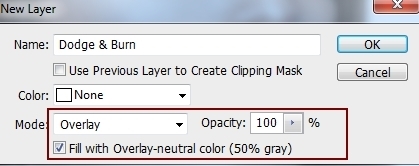
Make a new layer, change the mode to Overlay 100% and fill with 50% gray:
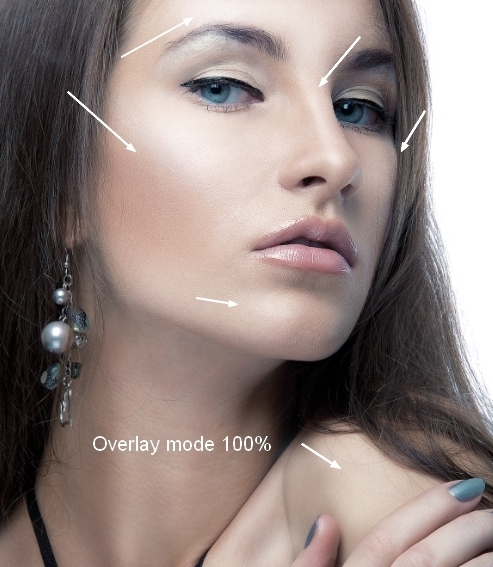
Active the Dodge and Burn Tool(O) with Midtones Range, Exposure 20% to refine the light and shade of the model and another details (eyes, nose, cheecks, forehead). You can see how I did it with Normalmode and the result with Overlay mode:

Step 15
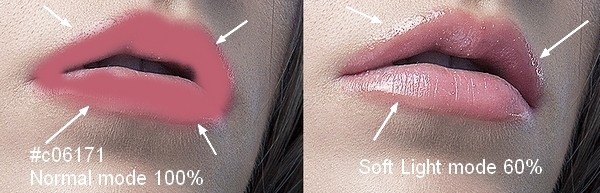
To enhance the lips I made a new layer, used a soft brush with the color #c06171 to paint on them. Change the mode to Soft Light 60%:
Step 16
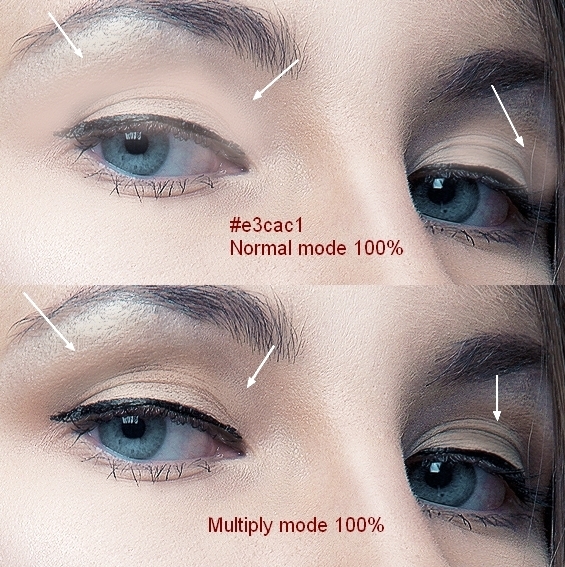
To add some light make-up to the eyes I used the soft brush with the color #e3cac1 to paint on the eyelids. Set the mode to Multiply 100%:
And We’re Done!
I hope that you enjoyed the tutorial.
Close-ups:


Create Leafy Text Effect in Photoshop
In this tutorial, I will show you the steps used to create this leafy text effect in Photoshop. We will explore the use of tree bark texture to form the basis of the text, then applying leaf texture over the text. We will utilise the chalk brush, various selection tools, image adjustments and basic dodge/burn effect.
This is a beginner to intermediate level tutorial.
Note: The Photoshop tutorial is done in Photoshop CC – therefore some screenshot may have slighting different layout as in the earlier version. Some brushes are exclusive to Photoshop CS6.
Here is a preview of the final effect I have for this tutorial: (click to enlarge)

Note: The Photoshop tutorial is done in Photoshop CC – therefore some screenshot may have slighting different layout as in the earlier version. Some brushes are exclusive to Photoshop CS6.

Step 1
Create a new document sized 1280px * 700px with white background. Use the Gradient Fill tool to fill the background layer as shown below:

Use any abstract brush set you like, paint some random patterns over the background as shown below:

Step 2
We will work on the text in this step. Load the tree bark texture in Photoshop and select a small piece from the texture as shown below:

Copy and paste the selection over to our document, re-size your new layer as shown below:

Repeat the above process to grab more tree barks, and form a letter H as shown below:

Continue and form the rest of the letters as shown below: (make sure you vary your selection so each letter looks different)

Go back to the tree bark texture and select a rounded portion, copy and paste the selection back to our document:

Make a smaller selection inside the circle – the selection doesn’t need to be centred:

Clear the selection and you will have a letter O as shown below:

Step 3
We will make the edge of the text a little rough. Grab the eraser tool and set its tip with the chalk brush as shown below:

Use this eraser and work through the edge as shown below in red: (you will need to rasterize the text layer first)

and here is the effect so far:

Duplicate this text layer twice and adjust the position of the duplicated layers slightly to make the text look bolder:

Step 4
We will add some leaves over our text. Load the leaf texture into Photoshop and select the following portion (you can use Quick Selection tool to achieve this)

Copy and paste the selection over to our document and cover the text:

Use the chalk brush eraser as in step 3, remove parts off the leaves and reveal the letters below:

Add some more leaves to the left and right side of the text:

You can also add a bulk of the leaves on the top right corner of the canvas:

Step 5
We’re almost done! We can flatten the image and duplicate the background layer, use the Unsharp Mask filter to sharpen the text a bit:

Add the following image adjustment layers on top:
Selective Color


Layer mask on the selective color adjustment layer:

Curves

We can also add some particles in the image with a particle brush:

Also paint some shadow with a soft brush under the text as shown below

and this is my final effect: (click to enlarge)
That’s it for this tutorial! Hope you enjoy going through it and find it useful. Drop me a comment below if you have any question.
Till next time, have a great day!

